The Evolution of AD RMS to Azure Information Protection – Part 1

The Evolution of AD RMS to Azure Information Protection – Part 1

Collaboration.  It’s a term I hear at least a few times a day when speaking to my user base.  The ability to seamlessly collaborate with team members, across the organization, with trusted partners, and with customers is a must.  It’s a driving force between much of the evolution of software-as-a-service collaboration offerings such as Office 365.  While the industry is evolving to make collaboration easier than ever, it’s also introducing significant challenges for organizations to protect and control their data.

In a recent post I talked about Microsoft’s entry into the cloud access security broker (CASB) market with Cloud App Security (CAS) and its capability to provide auditing and alerting on activities performed in Amazon Web Services (AWS).  Microsoft refers to this collection of features as the Investigate capability of CAS.  Before I cover an example of the Control features in action, I want to talk about the product that works behind the scenes to provide CAS with many of the Control features.

That product is Azure Information Protection (AIP) and it provides the capability to classify, label, and protect files and email.  The protection piece is provided by another Microsoft product, Azure Active Directory Rights Management Services (Azure RMS).  Beyond just encrypting a file or email, Azure RMS can control what a user can do with a file such as preventing a user from printing a document or forwarding an email.  The best part?  The protection goes with the data even when it leaves your security boundary.

For those of you that have read my blog you can see that I am a huge fanboy of the predecessor to Azure RMS, Active Directory Rights Management Services (AD RMS, previously Rights Management Service or RMS for you super nerds).  AD RMS has been a role available in Microsoft Windows Server since Windows Server 2003.  It was a product well ahead of its time that unfortunately never really caught on.  Given my love for AD RMS, I thought it would be really fun to do a series looking at how AIP has evolved from AD RMS.   It’s a dramatic shift from a rather unknown product to a product that provides capabilities that will be as standard and as necessary as Antivirus was to the on-premises world.

I built a pretty robust lab environment (two actually) such that I could demonstrate the different ways the solutions work as well as demonstrate what it looks to migrate from AD RMS to AIP.  Given the complexity of the lab environment,  I’m going to take this post to cover what I put together.

The layout looks like this:


1AIP1.png

On the modern end I have an Azure AD tenant with the custom domain assigned of geekintheweeds.com.  Attached to the tenant I have some Office 365 E5 and Enterprise Mobility + Security E5 trial licenses  For the legacy end I have two separate labs setup in Azure each within its own resource group.  Lab number one contains three virtual machines (VMs) that run a series of services included Active Directory Domain Services (AD DS), Active Directory Certificate Services (AD CS), AD RMS, and Microsoft SQL Server Express.  Lab number two contains four VMs that run the same set as services as Lab 1 in addition to Active Directory Federation Services (AD FS) and Azure Active Directory Connect (AADC).  The virtual network (vnet) within each resource group has been peered and both resource groups contain a virtual gateway which has been configured with a site-to-site virtual private network (VPN) back to my home Hyper-V environment.  In the Hyper V environment I have two workstations.

Lab 1 is my “legacy” environment and consists of servers running Windows 2008 R2 and Windows Server 2012 R2 (AD RMS hasn’t changed in any meaningful manner since 2008 R2) and a client running Windows 7 Pro running Office 2013.  The DNS namespace for its Active Directory forest is JOG.LOCAL.  Lab 2 is my “modern” environment and consists of servers running Windows Server 2016 and a Windows 10 client running Office 2016 .  It uses a DNS namespace of GEEKINTHEWEEDS.COM for its Active Directory forest and is synchronized with the Azure AD tenant I mentioned above.  AD FS provides SSO to Office 365 for Geek in The Weeds users.

For AD RMS configuration, both environments will initially use Cryptographic Mode 1 and will have a trusted user domain (TUD).  SQL Server Express will host the AD RMS database and I will store the cluster key locally within the database.  The use of a TUD will make the configuration a bit more interesting for reasons you’ll see in a future post.

Got all that?

In my next post I’ll cover how the architecture changes when migrating from AD RMS to Azure Information Protection.

AWS and Microsoft’s Cloud App Security

AWS and Microsoft’s Cloud App Security

It seems like it’s become a weekly occurrence to have sensitive data exposed due to poorly managed cloud services.  Due to Amazon’s large market share with Amazon Web Services (AWS) many of these instances involve publicly-accessible Simple Storage Service (S3) buckets.  In the last six months alone there were highly publicized incidents with FedEx and Verizon.  While the cloud can be empowering, it can also be very dangerous when there is a lack of governance, visibility, and acceptance of the different security mindset cloud requires.

Organizations that have been in operation for many years have grown to be very reliant on the network boundary acting as the primary security boundary.  As these organizations begin to move to a software defined data center model this traditional boundary quickly becomes less and less effective.  Unfortunately for these organizations this, in combination with a lack of sufficient understanding of cloud, gives rise to mistakes like sensitive data being exposed.

One way in which an organization can protect itself is to leverage technologies such as cloud access security brokers (cloud security gateways if you’re Forrester reader) to help monitor and control data as it travels between on-premises and the cloud.  If you’re unfamiliar with the concept of a CASB, I covered it in a previous entry and included a link to an article which provides a great overview.

Microsoft has its own CASB offering called Microsoft Cloud App Security (CAS).  It’s offered as part of Microsoft’s Enterprise Mobility and Security (EMS) E5/A5 subscription.  Over the past several months multiple connectors to third party software-as-a-service (SaaS) providers have been introduced, including one for AWS.  The capabilities with AWS are limited at this point to pulling administrative logs and user information but it shows promise.

As per usual, Microsoft provides an integration guide which is detailed in button pushing, but not so much in concepts and technical details as to what is happening behind the scenes.  Since the Azure AD and AWS blog series has attracted so many views, I thought it would be fun and informative to do an entry for how Cloud App Security can be used with AWS.

I’m not in the habit of re-creating documentation so I’ll be referencing the Microsoft integration guide throughout the post.

The first thing that needs doing is the creation of a security principal in AWS Identity and Access Management (AWS IAM) that will be used by your tenant’s instance of CAS to connect to resources in your AWS account.   The first four steps are straightforward but step 5 could a bit of an explanation.

awscas1.pngHere we’re creating a custom IAM policy for the security principal granting it a number of permissions within the AWS account.  IAM policies are sets of permissions which are attached to a human or non-human identity or AWS resource and are evaluated when a call to the resource is made.  In the traditional on-premises world, you can think of it as something somewhat similar to a set of NTFS file permissions.  When the policy pictured above is created the security principal is granted a set of permissions across all instances of CloudTrail, CloudWatch, and IAM within the account.

If you’re unfamiliar with AWS services, CloudTrail is a service which audits the API calls made to AWS resources.  Some of the information included in the events include the action taken, the resource the action was taken upon, the security principal that made the action, the date time, and source IP address of the security principal who performed the action.  The CloudWatch service allows for monitoring of metrics and optionally triggering events based upon metrics reaching specific thresholds.  The IAM service is AWS’s identity store for the cloud management layer.

Now that we have a basic understanding of the services, let’s look at the permissions Microsoft is requiring for CAS to do its thing.  The CloudTrail permissions of DescribeTrails, LookupEvents, and GetTrailStatus allow CAS to query for all trails enabled on an AWS account (CloudTrail is enabled by default on all AWS resources), lookup events in a trail, and get information about the trail such as start and stop logging times.  The CloudWatch permissions of Describe* and Get* are fancy ways of asking for  READ permissions on CloudWatch resources.  These permissions include describe-alarms-history, describe alarms, describe-alarms-for-metric, get-dashboard, and get-metric-statistics.  The IAM permissions are similar to what’s being asked for in CloudWatch, basically asking for full read.

Step number 11 instructs us to create a new CloudTrail trail.  AWS by default audits all events across all resources and stores them for 90 days.  Trails enable you to direct events captured by CloudTrail to an S3 bucket for archiving, analysis, and responding to events.

awscas2.png

The trail created is consumed by CAS to read the information captured via CloudTrail.  The permissions requested above become a bit more clear now that we see CAS is requesting read access for all trails across an account for monitoring goodness.  I’m unclear as to why CAS is asking for read for CloudWatch alarms unless it has some integration in that it monitors and reports on alarms configured for an AWS account.  The IAM read permissions are required so it can pull user  information it can use for the User Groups capability.

After the security principal is created and a sample trail is setup, it’s time to configure the connector for CAS.  Steps 12 – 15 walk through the process.  When it is complete AWS now shows as a connected app.

awscas3.png

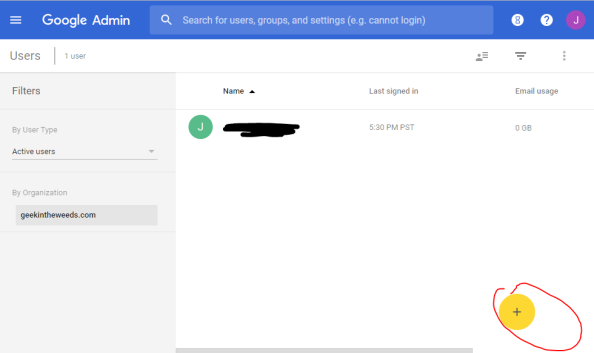
After a few hours data will start to trickle in from AWS.  Navigating to the Users and Accounts section shows all of the accounts found in the IAM instance for my AWS account.  Envision this as your one stop shop for identifying all of the user accounts across your many cloud services.  A single pane of glass to identity across SaaS.

awscas4.png

On the Activity Log I see all of the API activities captured by CloudTrail.  If I wanted to capture more audit information, I can enable CloudTrail for the relevant resource and point it to the trail I configured for CAS.  I haven’t tested what CAS does with multiple trails, but based upon the permissions we configured when we setup the security principal, it should technically be able to pull from any trail we create.

awscas7.png

Since the CAS and AWS integration is limited to pulling logging information, lets walk through an example of how we could use the data.  Take an example where an organization has a policy that the AWS root user should not be used for administrative activities due to the level of access the account gets by default.  The organization creates AWS IAM users accounts for each of its administrators who administer the cloud management layer.  In this scenario we can create a new policy in CAS to detect and alert on instances where the AWS root user is used.

First we navigate to the Policies page under the Control section of CAS.

awscas6.png

On the Policies page we’re going to choose to create a new policy settings in the image below.  We’ll designate this as a high severity privileged account alert.  We’re interested in knowing anytime the account is used so we choose the Single Activity option.

awscas7

We’ll pretend we were smart users of CAS and let it collect data for a few weeks to get a sampling of the types of events which are captured and to give us some data to analyze.  We also went the extra mile and leveraged the ability of CAS to pull in user information from AWS IAM such that we can choose the appropriate users from the drop-down menus.

Since this is a demo and my AWS lab has a lot of activity by the root account we’re going to limit our alerts to the creation of new AWS IAM users.  To do that we set our filter to look for an Activity type equal to Create user.  Our main goal is to capture usage of the root account so we add another filter rule that searches for a User with the name equal to aws root user where it is the actor in an event.

awscas8.png

Finally we configure the alert to send an email to the administrator when the event occurs.  The governance capabilities don’t come into play in this use case.

awscas9

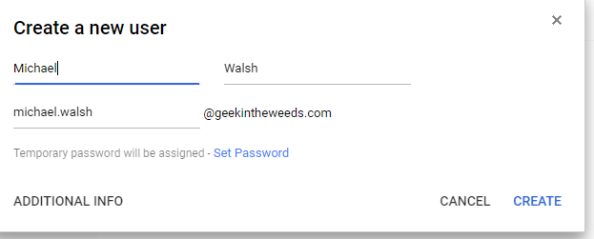
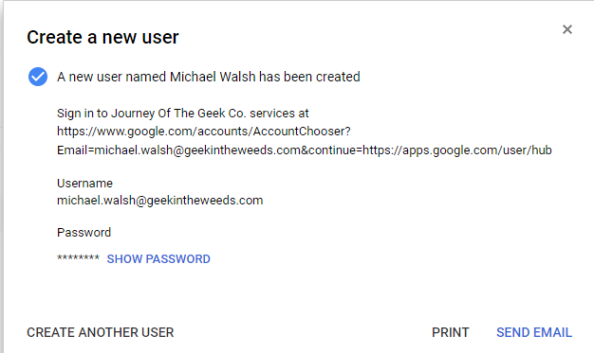
Next we jump back to AWS and create a new AWS IAM user named testuser1.  A few minutes after the user is created we see the event appearing in CloudTrail.

awscas10

After a few minutes, CAS generates and alert and I receive an email seen in the image below.   I’m given information as to the activity, the app, the date and time it was performed, and the client’s IP address.

awscas11.png

If I bounce back to CAS I see one new Alert.  Navigating to the alert I’m able to dismiss it, adjust the policy that generated it, or resolve it and add some notes to the resolution.

awscas12.png

I also have the option to dig deeper to see some of the patterns of the user’s behavior or the pattern of the behaviors from a specific IP address as seen below.

awscas13.png

awscas14.png

All this information is great, but what can we do with it?  In this example, it delivers visibility into the administrative activities occurring at the AWS cloud management layer by centralizing the data into a single repository which I can then send other data such as O365 activity, Box, SalesForces, etc.  By centralizing the information I can begin doing some behavioral analytics to develop standard patterns of behavior of my user base.  Understanding standard behavior patterns is key to being ahead of the bad guys whether they be insiders or outsiders.  I can search for deviations from standard patterns to detect a threat before it becomes too widespread.  I can also be proactive about putting alerts and enforcement (available for other app connectors in CAS but not AWS at this time) to stop the behavior before the threat is realized.  If I supplemented this data with log information from my on-premises proxy via Cloud App Discovery, I get an even larger sampling improving the quality of the data as well as giving me insight into shadow IT.  Pulling those “shadow” cloud solutions into the light allow me to ensure the usage of the services complies with organizational policies and opens up the opportunity of reducing costs by eliminating redundant services.

Microsoft categorizes the capabilities that help realize these benefits as the Discover and Investigate capabilities of CAS. The solution also offers a growing number of enforcement mechanisms (Microsoft categorized these enforcement mechanisms as Control) which add a whole other layer of power behind the solution.  Due to the limited integration with AWS I can’t demo those capabilities with this post.  I’ll cover those in a future post.

I hope this post helped you better understand the value that CASB/CSGs like Microsoft’s Cloud App Security can bring to the table.  While the product is still very new and a bit sparse on support with 3rd party applications, the list is growing every day. I predict the capabilities provided by technology such as Microsoft’s Cloud App Security will be as standard to IT as a firewall in the years to come.  If you’re already in Office 365 you should be ensuring you integrate these capabilities into your arsenal to understand the value they can bring to your business.

Thanks and have a wonderful week!

Integrating Azure AD and G-Suite – Single Sign-On

Integrating Azure AD and G-Suite – Single Sign-On

Hi everyone,

After working through the Azure Active Directory (AD) and Amazon Web Services (AWS) integration I thought it’d be fun to do the same thing with Google Apps.  Google provides a generic tutorial for single sign-on that is severely lacking in details.  Microsoft again provides a reasonable tutorial for integrating Azure AD and Google Apps for single sign-on.  Neither gives much detail about what goes on behind the scenes or provides the geeky details us technology folk love.  Where there is a lack of detail there is a blogging opportunity for Journey Of The Geek.

In my previous post I covered the benefits of introducing Azure AD as an Identity-as-a-Service (IDaaS) component to Software-as-a-Service (SaaS) integrations.  Read the post for full details but the short of it is the integration gives you value-added features such as multifactor authentication with Azure Multifactor Authentication (MFA), adaptive authentication with Azure AD Identity Protection, contextual authorization with Azure AD Conditional Access, and cloud access security broker (CASB) functionality through Cloud App Security.  Supplementing Google Apps with these additional capabilities improves visibility, security, and user experience.  Wins across the board, right?

I’m going to break the integration into a series of posts with the first focusing on single sign-on (SSO).  I’ll follow up with a post exploring the provisioning capabilities Azure AD introduces as well as playing around with Google’s API.  In a future post I’ll demonstrate what Cloud App Security can bring to the picture.

Let’s move ahead with the post, shall we?

The first thing I did was to add the Google Apps application to Azure AD through the Azure AD blade in the Azure Portal. Once the application was added successfully I navigated to the Single sign-on section of the configuration. Navigate to the SAML Signing Certification section and click the link to download the certificate. This is the certificate Azure AD will be using to sign the SAML assertions it generates for the SAML trust. Save this file because we’ll need it for the next step.

I next signed up for trial subscription of Google’s G Suite Business. This plan comes with a identity store, email, cloud storage, the Google productivity suite, and a variety of other tools and features. Sign up is straightforward so I won’t be covering it. After logging into the Google Admin Console as my newly minted administrator the main menu is displayed. From here I select the Security option.googlesso1

Once the Security page loads, I select the Set up single sign-on (SSO) menu to expand the option.  Google will be playing the role of the service provider, so I’ll be configuring the second section.  Check the box to choose to Setup SSO with third party identity provider.  Next up you’ll need to identify what your specific SAML2 endpoint is for your tenant.  The Microsoft article still references the endpoint used with the old login experience that was recently replaced.  You’ll instead want to use the endpoint https://login.microsoftonline.com/<tenantID>/saml2You’ll populate that endpoint for both the Sign-In and Sign-Out URLs.  I opted to choose the domain specific issuer option which sets the identifier Google identifies itself as in the SAML authentication request to include the domain name associated with the Google Apps account.  You would typically use this if you had multiple subscriptions of Google Apps using the same identity provider.  The final step is upload the certificate you downloaded from Azure AD.  At this point Google configured to redirect users accessing Google Apps (exempting the Admin Console) to Azure AD to authenticate.

googlesso2

Now that Google is configured, we need to finish the configuration on Azure AD’s end.  If you follow the Microsoft tutorial at this point you’re going to run into some issues.  In the previous step I opted to use a domain specific issuer, so I’ll need to set the identifier to google.com/a/geekintheweeds.com.  For the user identifier I’ll leave the default as the user’s user principal name since it will match the user’s identifier in Google.  I also remove the additional attributes Azure AD sends by default since Google will discard them anyway.  Once the settings are configured hit the Save button.

googlesso3

Now that both the IdP and SP have been created, it’s time to create a user in Google App to represent my user that will be coming from Azure AD.  I refer to this as a “stub user” as it is a record that represents my user who lives authoritatively in Azure Active Directory.    For that I switch back to the Google Admin console, click the User’s button, and click the button to create a new user.

googlesso4

Earlier I created a new user in Azure AD named Michael Walsh that has a login ID of michael.walsh@geekintheweeds.com. Since I’ll be passing the user’s user principal name (UPN) from Azure AD, I’ll need to set the user’s Google login name to match the user’s UPN.

googlesso5

I then hit the Create button and my new user is created.  You’ll need that Google assigns the user a temporary password.  Like many SaaS solutions Google maintains a credential associated with the user even when the user is configured to use SSO via SAML.  Our SP and IdP are configured and the stub user is created in Google, so we’re good to test it out.

googlesso6

I open up Edge and navigate to the Google Apps login page, type in my username, and click the Next button.

googlesso7

I’m then redirect to the Microsoft login page where I authenticate using my Azure AD credentials and hit the sign in button.

googlesso8

After successfully authenticating to Azure AD, I’m redirected back to Google and logged in to my newly created account.

googlesso9

So what happened in the background to make the magic happen?  Let’s take a look at a diagram and break down the Fiddler conversation.

googlesso10

The diagram above outlines the simple steps used to achieve the user experience.  First the user navigates to the Google login page (remember SP-initiated SSO), enters his or her username, and is sent back an authentication request seen below extracted from Fiddler with instructs to deliver it back to the Azure AD endpoint for our tenant.

googlesso11

googlesso12.png

The user then authenticates to Azure AD and receives back a SAML response with instructions to deliver it back to Google. The user’s browser posts the SAML assertion to the Google endpoint and the user is successfully authenticated to Google.

googlesso13.png

googlesso14.png

Simple right?  In comparison to the AWS integration from an SSO-perspective, this was much more straightforward.  Unlike the AWS integration, it is required to have a stub user for the user in Google Apps prior to using SSO.  This means there is some provisioning work to perform… or does it?  Azure AD’s integration again offers some degree of “provisioning”.  In my next post I’ll explore those capabilities and perform some simple actions inside Google’s API.

See you next post!

Office 365 Group Naming Policies – Part 2

Office 365 Group Naming Policies – Part 2

Welcome back.


In my first post I covered some of the methods organizations use to enforce a naming standard for groups, such as Active Directory groups, that are used to authorize access to data.  I also covered the challenges that are introduced when a mechanism for enforcing the naming standard doesn’t exist or isn’t effective and how this problem is becoming more prevalent with the increase in consumption of software-as-a-service applications.

Office 365 Groups are a core foundational component of Office 365 helping to enable simple, fast, and efficient collaboration within an organization.  For an organization to take full advantage of this, its end users need to be empowered to spin up Office 365 groups for mail-based collaboration or create new Teams for real-time collaboration. To make this work, IT can’t get in the way of the business and needs to let the business spin up and down Office 365 Groups as it needs them.  Microsoft has introduced a number of solutions to help with this including group expiration, integration with Office 365 retention policies, and the feature I’ll cover today, naming policies.

The naming policy feature is still in private preview but today I’m going to show you how to test the feature in your own tenant.  As a point of reference, I’m using a set of trial O365 E5 and Azure AD Premium P2 licenses within the commercial offering of Office 365 for my testing.  I can’t speak to whether or not the instructions below will work for Office 365 GCC or Office 365 Government.

The first thing I needed to do was install the Azure AD Preview module.  To do this I had to first remove the existing Azure AD module I had installed on my system and then install the Azure AD Preview module as seen below.

o365-1

Comparing the modules using a get-command shows that the preview module has the new cmdlets below.

Add-AzureADAdministrativeUnitMember
Add-AzureADApplicationPolicy
Add-AzureADMSLifecyclePolicyGroup
Add-AzureADScopedRoleMembership
Add-AzureADServicePrincipalPolicy
Get-AzureADAdministrativeUnit
Get-AzureADAdministrativeUnitMember
Get-AzureADApplicationPolicy
Get-AzureADDirectorySetting
Get-AzureADDirectorySettingTemplate
Get-AzureADMSDeletedDirectoryObject
Get-AzureADMSDeletedGroup
Get-AzureADMSGroup
Get-AzureADMSGroupLifecyclePolicy
Get-AzureADMSLifecyclePolicyGroup
Get-AzureADObjectSetting
Get-AzureADPolicy
Get-AzureADPolicyAppliedObject
Get-AzureADScopedRoleMembership
Get-AzureADServicePrincipalPolicy
New-AzureADAdministrativeUnit
New-AzureADDirectorySetting
New-AzureADMSGroup
New-AzureADMSGroupLifecyclePolicy
New-AzureADObjectSetting
New-AzureADPolicy
Remove-AzureADAdministrativeUnit
Remove-AzureADAdministrativeUnitMember
Remove-AzureADApplicationPolicy
Remove-AzureADDirectorySetting
Remove-AzureADMSDeletedDirectoryObject
Remove-AzureADMSGroup
Remove-AzureADMSGroupLifecyclePolicy
Remove-AzureADMSLifecyclePolicyGroup
Remove-AzureADObjectSetting
Remove-AzureADPolicy
Remove-AzureADScopedRoleMembership
Remove-AzureADServicePrincipalPolicy
Reset-AzureADMSLifeCycleGroup
Restore-AzureADMSDeletedDirectoryObject
Set-AzureADAdministrativeUnit
Set-AzureADDirectorySetting
Set-AzureADMSGroup
Set-AzureADMSGroupLifecyclePolicy
Set-AzureADObjectSetting
Set-AzureADPolicy

The cmdlets we’re interested in for this demonstration are the used to create and manage a new Graph API resource type called a directorySetting. The resource type is used to configure settings within Azure Active Directory. The directorySetting resource types are created from a template of configuration settings called a directorySettingTemplate resource type. Running the cmdlet Get-AzureADDirectorySettingTemplate displays the available to build a custom directorySetting from.

o365-2.png

After connection to Azure AD using the Connect-AzureAD cmdlet, I can take a look at the templates available. The template I’m interested in for this blog is the Group.Unified template because it contains the settings for the naming policy as seen below.

o365-3.png

Now that I’ve identified the template I want to draw from for a new directorySetting, I’m going to create a variable named $template and assign the Group.Unified template to it.  Running a quick Get-Member on the newly assigned displays a method named CreateDirectorySetting.  I’ll use this method to create a new instance of a directorySetting resource type based off the template and assign it to a variable named $setting.

o365-4.png

If I run a Get-Member on $setting I can see that I’ve created a new instance of the directorySetting resource type which has the settings inherited from the Group.Unified template with some of those settings being configured with default values.

o365-5.png

You’ll want to pay attention to these default values because once the settings become active for the tenant and seem to override settings configured within the GUI.  For example, if you are denying users the ability to create new Office 365 groups via the configuration setting in the Azure Active Directory blade in the Azure Portal, leaving the EnableGroupCreation setting as true will override that.  I’m not sure that is the intended behavior, but hey this is still preview right?

The next step is to configure the PrefixSuffixNamingRequirement setting with the naming convention I want enforced across my tenant.  This Microsoft article does a good job explaining your options and the syntax.  I went with a simple naming convention of including the fixed string “JOG” along with the value from the user’s department attribute in Azure Active Directory followed by the string value the user chooses for the group name.

o365-6.png

Checking the values property of the $setting shows that the PrefixSuffixNamingRequirement is now populated with the value I entered above.

o365-7.png

Now that the settings has been configured I make it active by using the New-AzureADDirectorySetting cmdlet and including the $setting directory object as input.

o365-8.png

I then log into the Office 365 portal as a standard user and navigate to Outlook Web App and attempt to create a new Office 365 group. All new groups are now created using the naming convention I defined and it’s displayed clearly to the end users.

o365-9.png

Hopefully Microsoft will refine the documentation as the feature moves out of preview and into general availability.  I also think this is a simple and static setting that would make sense to configurable from the GUI.  I’d also like to see the settings configurable with the directorySetting resource type be in sync with any corresponding settings in the GUI to avoid confusion.

That’s all there is to it.  Overall it’s a very simple yet elegant solution that solves naming convention woes while giving the business freedom to collaborate without having to go through IT.  You can’t beat that.

Thanks!