Hi there folks. Recently I was experimenting with the Azure Python SDK when I was writing a solution to pull information about Azure resources within a subscription. A function within the solution was used to pull a list of virtual machines in a given Azure subscription. While writing the function, I recalled that I hadn’t yet had experience handling paged results the Azure REST API which is the underlining API being used by the SDK.
I hopped over to the public documentation to see how the API handles paging. Come to find out the Azure REST API handles paging in a similar way as the Microsoft Graph API by returning a nextLink property which contains a reference used to retrieve the next page of results. The Azure REST API will typically return paged results for operations such as list when the items being returned exceed 1,000 items (note this can vary depending on the method called).
So great, I knew how paging was used. The next question was how the SDK would handle paged results. Would it be my responsibility or would it by handled by the SDK itself?
If you have experience with AWS’s Boto3 SDK for Python (absolutely stellar SDK by the way) and you’ve worked in large environments, you are probably familiar with the paginator subclass. Paginators exist for most of the AWS service classes such as IAM and S3. Here is an example of a code snipped from a solution I wrote to report on aws access keys.
def query_iam_users():

todaydate = (datetime.now()).strftime("%Y-%m-%d")
users = []
client = boto3.client(
'iam'
)

paginator = client.get_paginator('list_users')
response_iterator = paginator.paginate()
for page in response_iterator:
for user in page['Users']:
user_rec = {'loggedDate':todaydate,'username':user['UserName'],'account_number':(parse_arn(user['Arn']))}
users.append(user_rec)
return users
Paginators make handling paged results a breeze and allow for extensive flexibility in controlling how paging is handled by the underlining AWS API.
Circling back to the Azure SDK for Python, my next step was to hop over to the SDK public documentation. Navigating the documentation for the Azure SDK (at least for the Python SDK, I can’ t speak for the other languages) is a bit challenging. There are a ton of excellent code samples, but if you want to get down and dirty and create something new you’re going to have dig around a bit to find what you need. To pull a listing of virtual machines, I would be using the list_all method in VirtualMachinesOperations class. Unfortunately I couldn’t find any reference in the documentation to how paging is handled with the method or class.
So where to now? Well next step was the public Github repo for the SDK. After poking around the repo I located the documentation on the VirtualMachineOperations class. Searching the class definition, I was able to locate the code for the list_all() method. Right at the top of the definition was this comment:
Use the nextLink property in the response to get the next page of virtual
machines.
Sounds like handling paging is on you right? Not so fast. Digging further into the method I came across the function below. It looks like the method is handling paging itself releasing the consumer of the SDK of the overhead of writing additional code.
        def internal_paging(next_link=None):
            request = prepare_request(next_link)

            response = self._client.send(request, stream=False, **operation_config)

            if response.status_code not in [200]:
                exp = CloudError(response)
                exp.request_id = response.headers.get('x-ms-request-id')
                raise exp

            return response
I wanted to validate the behavior but unfortunately I couldn’t find any documentation on how to control the page size within the Azure REST API. I wasn’t about to create 1,001 virtual machines so instead I decided to use another class and method in the SDK. So what type of service would be a service that would return a hell of a lot of items? Logging of course! This meant using the list method of the ActivityLogsOperations class which is a subclass of the module for Azure Monitor and is used to pull log entries from the Azure Activity Log. Before I experimented with the class, I hopped back over to Github and pulled up the source code for the class. Low and behold we an internal_paging function within the list method that looks very similar to the one for the list_all vms.
        def internal_paging(next_link=None):
            request = prepare_request(next_link)

            response = self._client.send(request, stream=False, **operation_config)

            if response.status_code not in [200]:
                raise models.ErrorResponseException(self._deserialize, response)

            return response
Awesome, so I have a method that will likely create paged results, but how do I validate it is creating paged results and the SDK is handling them? For that I broke out one of my favorite tools Telerik’s Fiddler.
There are plenty of guides on Fiddler out there so I’m going to skip the basics of how to install it and get it running. Since the calls from the SDK are over HTTPS I needed to configure Fiddler to intercept secure web traffic. Once Fiddler was up and running I popped open Visual Studio Code, setup a new workspace, configured a Python virtual environment, and threw together the lines of code below to get the Activity Logs.
from azure.common.credentials import ServicePrincipalCredentials
from azure.mgmt.monitor import MonitorManagementClient

TENANT_ID = 'mytenant.com'
CLIENT = 'XXXXXXXX-XXXX-XXXX-XXXX-XXXXXXXXXXXX'
KEY = 'XXXXXX'
SUBSCRIPTION = 'XXXXXX-XXXX-XXXX-XXXX-XXXXXXXX'

credentials = ServicePrincipalCredentials(
    client_id = CLIENT,
    secret = KEY,
    tenant = TENANT_ID
)
client = MonitorManagementClient(
    credentials = credentials,
    subscription_id = SUBSCRIPTION
)

log = client.activity_logs.list(
    filter="eventTimestamp ge '2019-08-01T00:00:00.0000000Z' and eventTimestamp le '2019-08-24T00:00:00.0000000Z'"
)

for entry in log:
    print(entry)
Let me walk through the code quickly. To make the call I used an Azure AD Service Principal I had setup that was granted Reader permissions over the Azure subscription I was querying. After obtaining an access token for the service principal, I setup a MonitorManagementClient that was associated with the Azure subscription and dumped the contents of the Activity Log for the past 20ish days. Finally I incremented through the results to print out each log entry.
When I ran the code in Visual Studio Code an exception was thrown stating there was an certificate verification error.
requests.exceptions.SSLError: HTTPSConnectionPool(host='login.microsoftonline.com', port=443): Max retries exceeded with url: /mytenant.com/oauth2/token (Caused by SSLError(SSLCertVerificationError(1, '[SSL: CERTIFICATE_VERIFY_FAILED] certificate verify failed: unable to get local issuer certificate (_ssl.c:1056)')))
The exception is being thrown by the Python requests module which is being used underneath the covers by the SDK. The module performs certificate validation by default. The reason certificate verification is failing is Fiddler uses a self-signed certificate when configured to intercept secure traffic when its being used as a proxy. This allows it to decrypt secure web traffic sent by the client.
Python doesn’t use the Computer or User Windows certificate store so even after you trust the self-signed certificate created by Fiddler, certificate validation still fails. Like most cross platform solutions it uses its own certificate store which has to be managed separately as described in this Stack Overflow article. You should use the method described in the article for any production level code where you may be running into this error, such as when going through a corporate web proxy.
For the purposes of testing you can also pass the parameter verify with the value of False as seen below. I can’t stress this enough, be smart and do not bypass certificate validation outside of a lab environment scenario.
requests.get('https://somewebsite.org', verify=False)
So this is all well and good when you’re using the requests module directly, but what if you’re using the Azure SDK? To do it within the SDK we have to pass extra parameters called kwargs which the SDK refers to as an Operation config. The additional parameters passed will be passed downstream to the methods such as the methods used by the requests module.
Here I modified the earlier code to tell the requests methods to ignore certificate validation for the calls to obtain the access token and call the list method.
from azure.common.credentials import ServicePrincipalCredentials
from azure.mgmt.monitor import MonitorManagementClient

TENANT_ID = 'mytenant.com'
CLIENT = 'XXXXXXXX-XXXX-XXXX-XXXX-XXXXXXXXXXXX'
KEY = 'XXXXXX'
SUBSCRIPTION = 'XXXXXX-XXXX-XXXX-XXXX-XXXXXXXX'

credentials = ServicePrincipalCredentials(
    client_id = CLIENT,
    secret = KEY,
    tenant = TENANT_ID,
    verify = False
)
client = MonitorManagementClient(
    credentials = credentials,
    subscription_id = SUBSCRIPTION,
    verify = False
)

log = client.activity_logs.list(
    filter="eventTimestamp ge '2019-08-01T00:00:00.0000000Z' and eventTimestamp le '2019-08-24T00:00:00.0000000Z'",
    verify = False
)

for entry in log:
    print(entry)
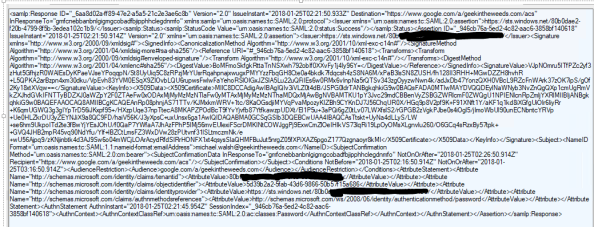
After the modifications the code ran successfully and I was able to verify that the SDK was handling paging for me.

Let’s sum up what we learned:
- When using an Azure SDK leverage the Azure REST API reference to better understand the calls the SDK is making
- Use Fiddler to analyze and debug issues with the Azure SDK
- Never turn off certificate verification in a production environment and instead validate the certificate verification error is legitimate and if so add the certificate to the trusted store
- In lab environments, certificate verification can be disabled by passing an additional parameter of verify=False with the SDK method
Hope that helps folks. See you next time!