Hi everyone. I apologize for the delay in publishing the last post in this series. The past few months have been hectic. For this last post of the year I will be completing the series on provisioning in Azure AD.
As I’ve covered in earlier posts, there are a lot of options when provisioning to Azure AD including multiple GUIs and programmatic options. I’ve covered provisioning in the Azure Management Portal, Azure Portal, Office 365 Admin Center, and Azure Active Directory PowerShell v1 and v2. In this final post I will cover provisioning via the Graph API using a simple ASP .NET web application.
I was originally going to leverage the graph API directly via PowerShell using the .NET ADAL libraries and Invoke-WebRequest cmdlets. I’ve been playing around a lot with Visual Studio creating simple applications like the Azure B2B provisioning app. I decided to challenge myself by adding additional functionality to the ASP .NET web application I assembled in my previous post. I enjoyed the hell out of the process, learned a bunch more about .NET, C#, ASP .NET web apps, and applications built using the MVC architecture. Let’s get to it shall we?
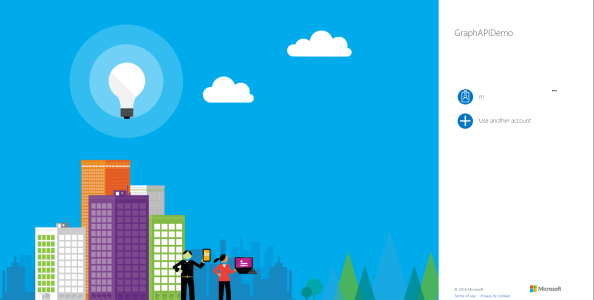
Before we dive into the code and the methodologies I used to put together the application, let’s take a look at it in action. The application starts by requiring authentication to Azure AD.
After successful authentication, the main page for the website loads. You’ll notice from the interface that I used the sample ASP .NET MVC Web Application available in Visual Studio but added a new navigation link on the right hand side named Create User.

After clicking the Create User link, the user is redirected to a simple (i.e. ugly) web form where information about the new user is collected.

After the user hits submit, the new user is created in Azure AD and the information from the returned JWT is parsed and displayed in a table.

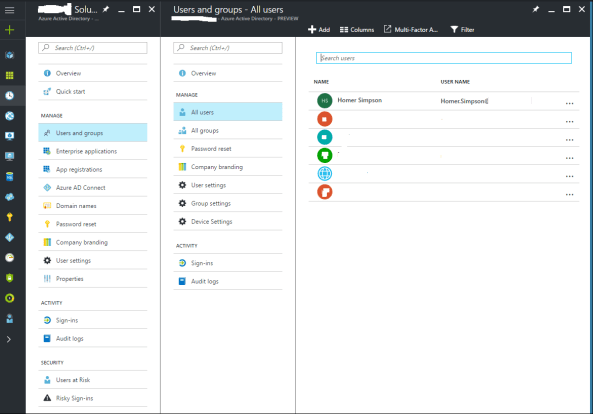
When we navigate to the Azure AD blade in the Azure Portal we see that Homer has been created and added to the system.
So you’re probably asking the question as to how complicated it was to put this application together? The answer may surprise you. It was incredibly simple. The most difficult part of the process was learning my away around C# and how MVC web apps are put together. For a skilled developer, this would have taken an hour versus the days it took me.
The first thing I did was do some reading into the Graph API, specifically around managing users. Microsoft has a number of great instructions located here and here. After getting familiar with the required inputs and the outputs, I built a new model in my application that would be used for the user form input.

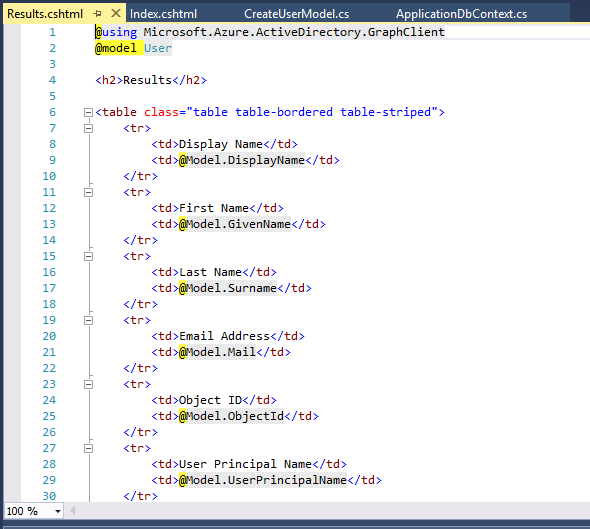
Once I had my new model assembled, I then created two new views under a new folder named Create User. The view named Index is the view that takes the user input and the view named Results is the view that spits back some of the content from the JWT returned from Azure after the user is successfully created. Here is the code for the Index view.

And the code for the Results view.
After the new views were created, I then moved on to creating the guts of the new functionality with a new controller named CreateUserController. I was able to reuse some of the code from the UserProfileController to obtain the necessary OAuth access token to delegate the rights to the application to create the new user.

The remaining code in my controller came from a crash course in programming and MVC web apps. The first section of code calls the task to obtain the access token.

The next section of code creates a new instance of the user class and populates the properties with information collected from the form.

The final section of code attempts to create the new user and displays the results page with information about the user such as objectID and userPrincipalName. If the application is unable to create the user, the exception is caught, and an error page is displayed.

But wait… what is missing? I’ll give you a hint, it’s not code.
The answer is the appropriate delegated permissions. Even if the user is a global admin, the application can’t perform the actions of a global admin unless we allow it to. To make this happen, we’ll log into the Azure Portal, access the Azure AD blade, and grant the application the delegated permission to Access the directory as the signed-in user.

Simple right? The Azure Active Directory Graph Client libraries make the whole process incredibly easy doing a whole lot with very little code. Imagine integrating this functionality into an existing service catalog. Let’s say you have a business user who needs access to Dynamics CRM Online. The user could navigate to the service catalog and request access. After their manager approvers, the application powering the service catalog could provision the new user, assign the license for Dynamics CRM Online, and drop the user into the appropriate groups. All of this could happen without having to involve IT. This is the value of a simple API with a wonderful set of libraries.
Well folks that wraps up my last post the year. I’ll return next year with a series of deep dives exploring Microsoft’s newly announced Azure AD Pass-through authentication and SSO features. Have a happy holiday!
