This is part of my series on Microsoft Entra ID:
- Entra ID – Deep Dive – The Basics – Part 1
- Entra ID – Deep Dive – Protocol Primer – Part 2
- Entra ID – Deep Dive – Entra ID Authentication – Part 3
- Entra ID – Deep Dive – Workload Identity Federation – Bonus
Back for more are ya? Today we’re gonna chat about how you could add Entra ID authentication into your custom-built web application. I’ll be digging into the Entra ID application registration process and examining the requests and responses for the whole authentication process via a local proxy using HTTP Toolkit. The goal here is not to give you coding best practices (god save you if you use any of my code in production) but instead to help you understand how all this stuff works and how products are (and are not) exercising the OIDC and OAuth protocols under the hood.
If you haven’t read my first and second post in the series, stop what you’re doing right now and read them. I’m going into this post assuming you have and thus assuming knowledge and understanding basic Entra ID concepts like applications vs service principals and a foundational understanding of OIDC and OAuth.
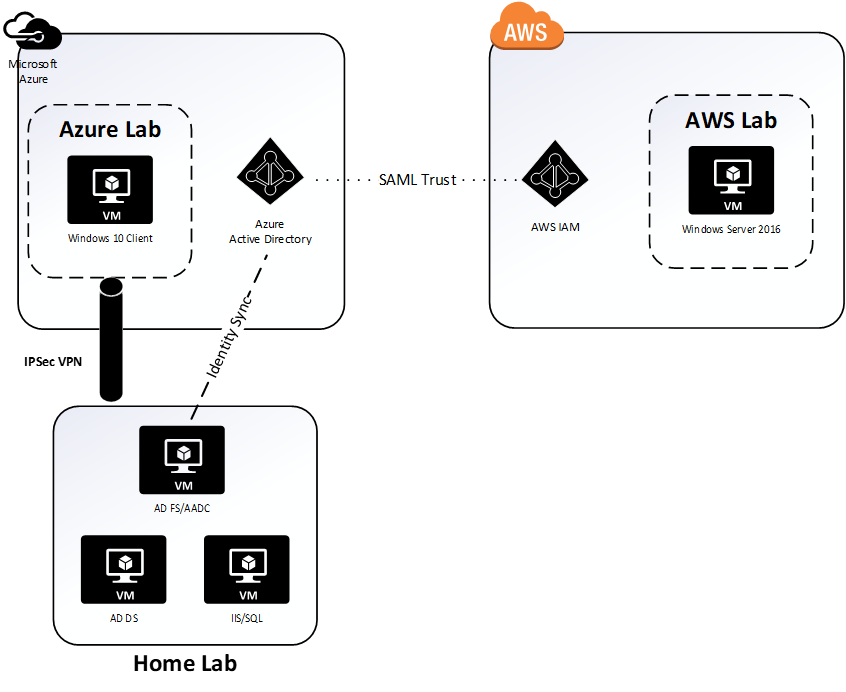
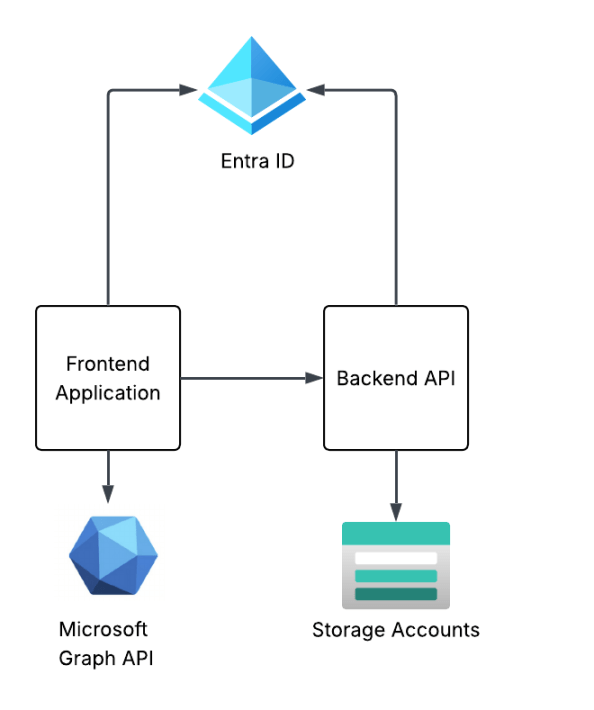
The solution design I’m building towards this in this series of posts is a simple frontend web application and backend API that are using Entra ID for authentication and authorization. The end design will look something like the below. This post will focus on the frontend web application.
Creating the frontend application registration
As I covered in my first post, the application registration (or application resource) is the globally unique representation of the application across Entra ID. There can only be one application registration for an application across all Entra ID tenants. An application registration can be single tenant (used only in your Entra ID tenant) or multi-tenant (can be used across Entra ID tenants). I like to think of the process of creating the application process similar to the manual client registration process mentioned in the OAuth spec. The result is the same as we’ll configure a bunch of information required for OAuth such as the redirect URI, the grant types it supports, and whether the client will be public or confidential client. Once registered, Entra will return a unique client_id and client_secret if a confidential application. There are additional Entra-specific properties we can populate, but the manual client registration explanation makes the most sense in my brain at least.
Creating an application registration can be done through the Portal, CLI/PowerShell, REST, Terraform, etc. I’m going to create it direct through the Microsoft Graph REST API because I want to walk through all the gory properties. To create an app registration, your user account needs to be at least hold the Entra ID Application Developer role. To keep things simple and address my laziness, my user will be setup as a global admin.
# Set the properties for the applicationapp_display_name = "Demo frontend app for Entra authentication"description = "This app is used to demonstrate a frontend application where a user authenticates using Entra ID authentication via OIDC"contact = "business_unit1@my.com"........# Create an app registrationdef create_app_registration(display_name: str, contact: str): """This function creates a new application registration in Microsoft Graph API if it doesn't already exist Args: display_name (str): The display name for the new application registration. contact (str): The contact information to associate with the application registration. Returns: dict: The details of the created application registration. """ check_app = get_app_registration_by_display_name(display_name) if check_app is not None: print(f"Application {check_app['displayName']} already exists and its id is {check_app['id']}") return check_app else: print("Creating new application registration...") body = { "displayName": display_name, "description": description, # Setting to false means this is a confidential client application vs a public client "isFallbackPublicClient": False, # Set a service management reference which can be the contact associated with the application "serviceManagementReference": contact, # Create the app as multi tenant; single tenant would use AzureADMyOrg "signInAudience": "AzureADMultipleOrgs", # Add a redirect URI to support OIDC authentication "web": { "redirectUris": [ "http://localhost:8100/callback" ] } } response = requests.post( 'https://graph.microsoft.com/v1.0/applications', headers={ 'Content-Type': 'application/json', 'Authorization': f'Bearer {user_token.token}' }, json=body ) return response.json()app_frontend = create_app_registration(app_display_name, contact)print(json.dumps(app_frontend, indent=2))
The application registration I’m creating above is being created as a multi-tenant application instead of a single tenant application and is determined by the signInAudience being set to a value of AzureADMultipleOrgs. I’m doing this because I may do an additional post in this series walking through multi-tenant applications. Most of the application registrations you create will be single tenant and would have this property set to AzureADMyOrg.
Since I’m building a web application, I’m going to be configuring it as a confidential client (which means it will have a credential) and I’m going to use the authorization code flow. I don’t want my application registration to ever support being used as a public client so I set isFallbackPublicClient to false. This will force my client to provide a credential when attempting to obtain a token. If you were building an application that would live direct on the user’s desktop or mobile device, you’d need to set to that true because at that point your application would be a public client.
Under the web property, I’m setting the redirectUri property to the endpoint in my application I want the user redirected to after the user successfully authenticates to Entra ID and consents to whatever scope the application (or OAuth client) is requesting. In this case, my application runs directly on my machine so this is set to localhost.
You’ll also see I’m setting the serviceManagementReference property. Best practice is for you to set this property with a contact within the business unit for that owns the application. This can be helpful if the application registration becomes stale at this point and you detect that during your regular audits (which OF COURSE you’re doing!)
Once complete, I get the response below.
Creating new application registration...{ "@odata.context": "https://graph.microsoft.com/v1.0/$metadata#applications/$entity", "id": "be0af053-faf4-44b3-b071-XXXXXXXX", "deletedDateTime": null, "appId": "fc815c55-d456-4d38-be76-XXXXXXXX", "applicationTemplateId": null, "disabledByMicrosoftStatus": null, "createdByAppId": "04b07795-8ddb-461a-XXXXXXXXXXXX", "createdDateTime": "2026-06-25T01:19:12.1150491Z", "displayName": "Demo frontend app for Entra authentication", "description": "This app is used to demonstrate a frontend application where a user authenticates using Entra ID authentication via OIDC", "groupMembershipClaims": null, "identifierUris": [], "isDeviceOnlyAuthSupported": null, "isDisabled": null, "isFallbackPublicClient": false, "nativeAuthenticationApisEnabled": null, "notes": null, "publisherDomain": "XXXXXXXX.onmicrosoft.com", "serviceManagementReference": "business_unit1@jogcloud.com", "signInAudience": "AzureADMultipleOrgs", "tags": [], "tokenEncryptionKeyId": null, "uniqueName": null, "samlMetadataUrl": null, "defaultRedirectUri": null, "certification": null, "optionalClaims": null, "servicePrincipalLockConfiguration": null, "requestSignatureVerification": null, "addIns": [], "api": { "acceptMappedClaims": null, "knownClientApplications": [], "requestedAccessTokenVersion": null, "oauth2PermissionScopes": [], "preAuthorizedApplications": [] }, "appRoles": [], "info": { "logoUrl": null, "marketingUrl": null, "privacyStatementUrl": null, "supportUrl": null, "termsOfServiceUrl": null }, "keyCredentials": [], "parentalControlSettings": { "countriesBlockedForMinors": [], "legalAgeGroupRule": "Allow" }, "passwordCredentials": [], "publicClient": { "redirectUris": [] }, "requiredResourceAccess": [], "verifiedPublisher": { "displayName": null, "verifiedPublisherId": null, "addedDateTime": null }, "web": { "homePageUrl": null, "logoutUrl": null, "redirectUris": [ "http://localhost:8100/callback" ], "implicitGrantSettings": { "enableAccessTokenIssuance": false, "enableIdTokenIssuance": false }, "redirectUriSettings": [ { "uri": "http://localhost:8100/callback", "index": null } ] }, "spa": { "redirectUris": [] }}
Next up, I want to set an owner. Every application registration should have an owner and this is a child object of the application. Now don’t go willy-nilly throwing any business unit person into that field (the owner cannot be a group as of the date of this post). When a user is an owner of an application registration, they can modify the application registration. The owner should be set to some privileged user account in Entra where access to that privileged account is tightly controlled.
import requestsimport json# Set the owners of the application using their Entra ID user object idowners = [ "2e69d9f2-b5b3-482b-9c15-XXXXXXXXXXXX"]........# Add owners to the application registrationdef add_owners_app_registration(owners: list, app_id: str): """This function adds owners to an application registration in Microsoft Graph API Args: owners (list): A list of Entra ID user object IDs to add as owners. app_id (str): The object ID of the application registration to add owners to. Returns: list: The updated list of owners for the application registration. """ # Check the current owners to see if the owner is already listed check_owners = get_app_registration_owner(app_id) if check_owners is not None: for owner in owners: if owner in [o['id'] for o in check_owners]: print(f"Owner {owner} is already an owner of the application.") # Since owner isn't there, add it else: print(f"Adding owner {owner} to the application...") response = requests.post( f'https://graph.microsoft.com/v1.0/applications/{app_id}/owners/$ref', headers={ 'Content-Type': 'application/json', 'Authorization': f'Bearer {user_token.token}' }, json={ "@odata.id": f"https://graph.microsoft.com/v1.0/directoryObjects/{owner}" } ) if response.status_code == 204: print(f"Owner {owner} added successfully.") else: print(f"Failed to add owner {owner}. Response: {response.status_code} - {response.text}") else: print("No current owners found for the application.") for owner in owners: print(f"Adding owner {owner} to the application...") response = requests.post( f'https://graph.microsoft.com/v1.0/applications/{app_id}/owners/$ref', headers={ 'Content-Type': 'application/json', 'Authorization': f'Bearer {user_token.token}' }, json={ "@odata.id": f"https://graph.microsoft.com/v1.0/directoryObjects/{owner}" } ) if response.status_code == 204: print(f"Owner {owner} added successfully.") else: print(f"Failed to add owner {owner}. Response: {response.status_code} - {response.text}") new_owners = get_app_registration_owner(app_id) return new_ownersnew_owners = add_owners_app_registration(owners = owners, app_id=app_frontend['id'])print(json.dumps(new_owners, indent=2))
Next up I need to create a client credential for my application. This will act as its client_secret to support its confidential client status. Entra ID supports multiple types of credentials including a basic client secret, client certificate, and federated credential. Of the three, the federated credential is the sweet spot if you can make it work. This is where you can use something like a managed identity which means the actual secret is automatically managed and rotated by Microsoft. Way easier lifecycle. Federated credentials can also use external identity providers, like GCP, GitHub and others neat integrations via the workload identity federation. A client certificate should be your next preferred credential since it has higher assurance and avoids having to worry about secret rotation and leakage. Since I’m lazy, I’ll be using a client secret.
Below I create a client secret that will be valid for a year.
# Create a date one year from now that will be used to expire the app registration credentialstart_date = datetime.now(timezone.utc)end_date = (datetime.now(timezone.utc) + relativedelta(years=1)).replace(hour=23, minute=59, second=59, microsecond=0)formatted_start_date = start_date.strftime('%Y-%m-%dT%H:%M:%SZ')formatted_end_date = end_date.strftime('%Y-%m-%dT%H:%M:%SZ').........# Create a client secretdef create_password_credential(app_id, end_date, start_date, override=False): """This function creates a password credential for an application registration in Microsoft Graph API. It will delete existing credentials if override is set to True, otherwise it will return a message that a credential already exists. Args: app_id (str): The object ID of the application registration to create a password credential for. end_date (str): The end date and time for the password credential in ISO 8601 format. start_date (str): The start date and time for the password credential in ISO 8601 format. override (bool): Whether to override existing password credentials. Defaults to False. Returns: dict: The deatils of the created password credential or a blank dict if a credential already exists and override is False. """ # Check to see if the app already has a password credential app = get_app_registration(app_id) if app['passwordCredentials'] == []: # Create a new credential body = { "displayName": "primary", "endDateTime": end_date, "startDateTime": start_date } response = requests.post( f'https://graph.microsoft.com/beta/applications/{app_id}/addPassword', headers={ 'Content-Type': 'application/json', 'Authorization': f'Bearer {user_token.token}' }, json=body ) if response.status_code != 200: print(f"Error creating password credential: {response.status_code}: {response.text}") else: print("Created new password credential.") return response.json() elif override: # Delete existing credentials for cred in app['passwordCredentials']: print("Deleting existing password credential...") response = requests.post( f'https://graph.microsoft.com/beta/applications/{app_id}/removePassword', headers={ 'Content-Type': 'application/json', 'Authorization': f'Bearer {user_token.token}' }, json={ "keyId": cred['keyId'] } ) if response.status_code != 204: print(f"Error deleting password credential: {response.status_code}: {response.text}") # Create a new credential body = { "displayName": "primary", "endDateTime": end_date, "startDateTime": start_date } response = requests.post( f'https://graph.microsoft.com/beta/applications/{app_id}/addPassword', headers={ 'Content-Type': 'application/json', 'Authorization': f'Bearer {user_token.token}' }, json=body ) if response.status_code != 200: print(f"Error creating password credential: {response.status_code}: {response.text}") else: print("Created new password credential after deleting existing one.") return response.json() else: print("A secret already exists. You can delete it and create a new one by setting override=True") return app['passwordCredentials'][0] password_credential_frontend = create_password_credential(app_frontend['id'], formatted_end_date, formatted_start_date, override=False)
Alright, at this point we have an application registration and client credential, which essentially means we have manually registered the application as an OAuth client to the authorization server (Entra ID). I now have a client_id (appId property) and client_secret. What next?
Creating the frontend service principal
I now need a security principal (or identity) to act as an identity for this instance of my application in this Entra ID tenant. In comes the service principal. There are many types of service principals as I mentioned previously, for this use case I’ll be creating an application service principal. Manual creation of this is only required because I’m creating it programmatically through REST. If I created this app registration in Azure Portal a service principal would automatically be created.
Creating the service principal is very straightforward and there’s not much need you to pass beyond the appId (or client id) of the application registration. Most of the properties are synchronized from the application resource the service principal is being created for. You’ll reference the appId of the application resource which handles the mapping back to the application resource.
def create_service_principal(app_id: str): """This function creates a service principal for an application registration in Microsoft Graph API if it doesn't already exist Args: app_id (str): The application ID of the service principal to create. Returns: dict or None: The details of the created service principal if successful, otherwise None. """ # Check to see if the service principal already exists service_principal = get_service_principal_by_app_id(app_id) if service_principal is not None: print(f"Service principal already exists: {service_principal['id']}") return service_principal else: body = { "appId": app_id } response = requests.post( 'https://graph.microsoft.com/v1.0/servicePrincipals', headers={ 'Content-Type': 'application/json', 'Authorization': f'Bearer {user_token.token}' }, json=body ) if response.status_code == 201: return response.json() else: print(f"Error creating service principal: {response.status_code}: {response.text}") return None# Get or create the service principalservice_principal_frontend = create_service_principal(app_frontend['appId'])print(json.dumps(service_principal_frontend, indent=2))
This spits out a new service principal object seen below. If we want the instance of the application to access any resources itself or in a delegated manner, the service principal will be the resource that is granted the permissions.
{ "@odata.context": "https://graph.microsoft.com/v1.0/$metadata#servicePrincipals/$entity", "id": "ce341fd2-fd6b-4dab-9beb-XXXXXXXXXXXX", "deletedDateTime": null, "accountEnabled": true, "alternativeNames": [], "appDisplayName": "Demo frontend app for Entra authentication", "appDescription": "This app is used to demonstrate a frontend application where a user authenticates using Entra ID authentication via OIDC", "appId": "fc815c55-d456-4d38-be76-XXXXXXXXXXX", "applicationTemplateId": null, "appOwnerOrganizationId": "6c80de31-d5e4-4029-93e4-XXXXXXXXXXXX", "appRoleAssignmentRequired": false, "createdByAppId": "04b07795-8ddb-461a-bbee-XXXXXXXXXXXX", "createdDateTime": "2026-06-25T01:41:05Z", "description": null, "disabledByMicrosoftStatus": null, "displayName": "Demo frontend app for Entra authentication", "homepage": null, "isDisabled": null, "loginUrl": null, "logoutUrl": null, "notes": null, "notificationEmailAddresses": [], "preferredSingleSignOnMode": null, "preferredTokenSigningKeyThumbprint": null, "replyUrls": [ "http://localhost:8100/callback" ], "servicePrincipalNames": [ "fc815c55-d456-4d38-be76-XXXXXXXXXXX ], "servicePrincipalType": "Application", "signInAudience": "AzureADMultipleOrgs", "tags": [], "tokenEncryptionKeyId": null, "samlSingleSignOnSettings": null, "addIns": [], "appRoles": [], "info": { "logoUrl": null, "marketingUrl": null, "privacyStatementUrl": null, "supportUrl": null, "termsOfServiceUrl": null }, "keyCredentials": [], "oauth2PermissionScopes": [], "passwordCredentials": [], "resourceSpecificApplicationPermissions": [], "verifiedPublisher": { "displayName": null, "verifiedPublisherId": null, "addedDateTime": null }}
Document your required permissions!
It’s best practice to document the permission your application will require versus being an asshole and forcing someone to guess, struggle, learn to hate you, and likely over permission. While this isn’t required for delegated permissions, it’s still best practice if possible. It should be possible in almost all instances (with some exceptions for agents if you’re brave enough). Permissions are divided into two categories which include role permissions and scope permissions. Role permissions are going to be the permissions the app exercises using its own identity context (we’ll see some of this in a future post) and scope permissions are going to be delegated permissions it requires. The permissions an application requires can be documented as part of the app registration (or application resource) by setting the requiredResourceAccess property of the application registration. This doesn’t grant any access, but simply informs the administrator what permissions will be required from the application. It doesn’t prohibit the administrator or user granting it additional permissions beyond what is required.
# Get the existing app permissionsdef get_app_permissions(id: str): """This function retrieves the existing permissions required for an application registration from the Microsoft Graph API. Args: id (str): The object ID of the application registration to retrieve permissions for. Returns: list: A list of required resource permissions or else an empty list """ response = requests.get( f'https://graph.microsoft.com/v1.0/applications/{id}', headers={ 'Content-Type': 'application/json', 'Authorization': f'Bearer {user_token.token}' } ) if response.status_code != 200: print(f"Error getting app permissions: {response.status_code}: {response.text}") return None # Return the current permission set or a blank array if there are no permissions currently set return response.json().get('requiredResourceAccess') or []# Add the app permissions to the app registration. This is useful for multi-tenant apps to document required permissions. It does not grant any permissions.def add_app_permissions(app_id: str, resource_access: list): """This function adds the required permissions to an application registration in Microsoft Graph API Args: app_id (str): The object ID of the application registration to add permissions to. resource_access (list): A list of permissions to add to the application registration in the format of requiredResourceAccess. Returns: dict or None: The updated application registration details if successful, otherwise None. """ # Get the existing permissions in order to append to them app_permissions = get_app_permissions(app_id) # Append the new permissions to the existing ones for permission in resource_access: # Check if this resource already exists in the app permissions existing_resource = None for resource in app_permissions: if resource['resourceAppId'] == permission['resourceAppId']: existing_resource = resource break if existing_resource: # Append the new permissions to the existing resource for access in permission['resourceAccess']: if access not in existing_resource['resourceAccess']: existing_resource['resourceAccess'].append(access) else: # Add the new resource and its permissions app_permissions.append(permission) # Update the app registration with the new permissions body = { "requiredResourceAccess": app_permissions } response = requests.patch( f'https://graph.microsoft.com/v1.0/applications/{app_id}', headers={ 'Content-Type': 'application/json', 'Authorization': f'Bearer {user_token.token}' }, json=body ) if response.status_code != 204: print(f"Error adding app permissions: {response.status_code}: {response.text}") return None else: print("App permissions documented as required successfully.") return get_app_registration(app_id)new_permissions = [ { "resourceAppId": "00000003-0000-0000-c000-000000000000", # Microsoft Graph "resourceAccess": [ { "id": "e1fe6dd8-ba31-4d61-89e7-88639da4683d", # User.Read "type": "Scope" } ] }]app_required_permissions = add_app_permissions(app_frontend['id'], new_permissions)['requiredResourceAccess']print("\n=== App required permissions ===")print(json.dumps(app_required_permissions, indent=2))
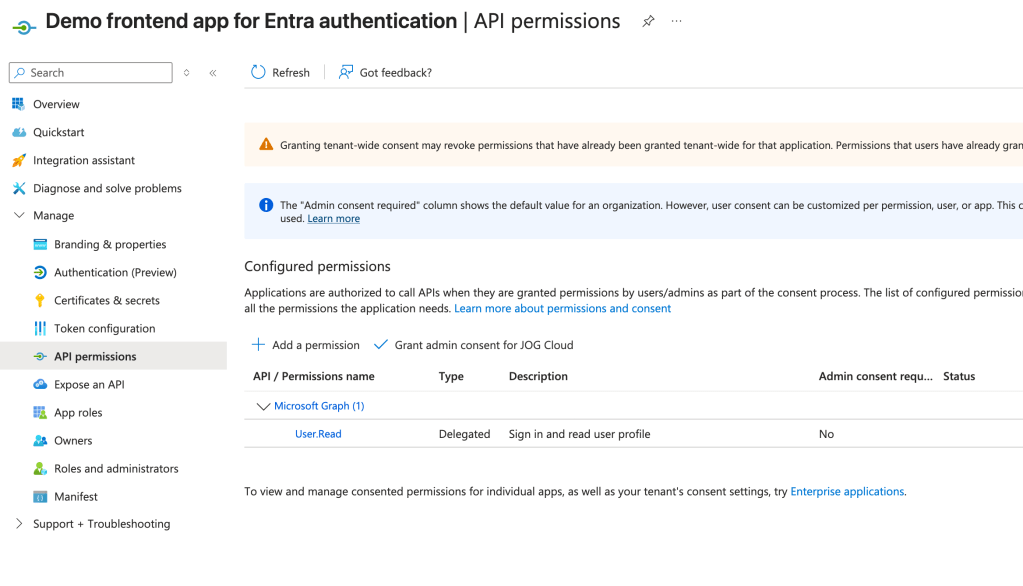
Once those are added they will appear in the API permissions section of the Application Registration inside of the Azure Portal as seen below. For my app I’m documenting that it requires the User.Read delegated permission on the Microsoft Graph API. For some of the built-in applications like the Microsoft Graph, some permissions will require admin consent and some will not like User.Read. Like I covered in my first post, this is determined by the creator of the application resource when they define the scopes. If you add these things programmatically it’s a bit more work because you need to dig up the resource’s appId and object ids of the permission. Something like Microsoft Graph is well documented. For other applications, you’ll need to do some digging via API calls.
Alright, at this point we’re ready to test our app!
Authenticating to the application
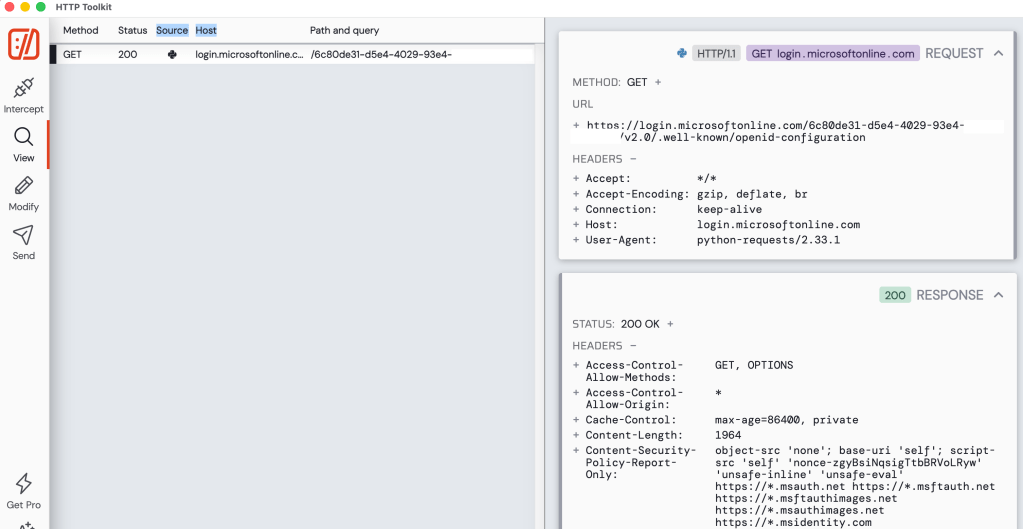
After starting the application I immediately see a lookup to metadata endpoint for the OIDC and OAuth endpoints. This is triggered an MSAL instance is started in the code. These endpoints will be used throughout the login process.
Opening my website I’m faced with a very simple login screen (simple setup for a simple man).
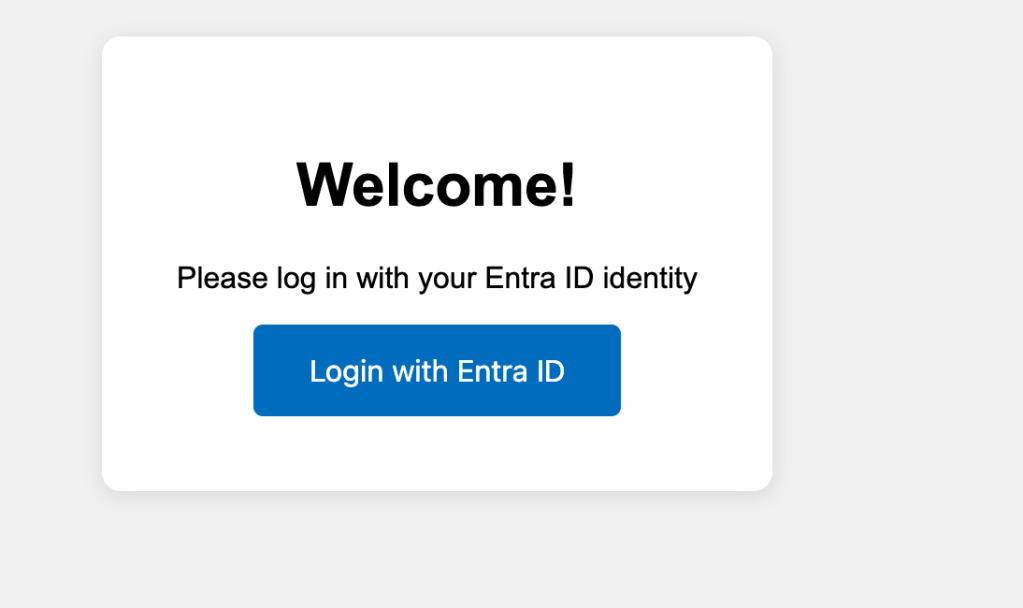
Once I click login with Entra ID, the underlining MSAL library redirects me to the /authorize endpoint of Entra where my user is prompted to authenticate. The request that is generated is below.
https://login.microsoftonline.com/6c80de31-d5e4-4029-93e4-XXXXXXXXXXXX/oauth2/v2.0/authorize?client_id=afbd7539-a21f-4d11-93a3-XXXXXXXXXXXX&response_type=code&redirect_uri=http%3A%2F%2Flocalhost%3A8100%2Fcallback&scope=User.Read+offline_access+openid+profile&state=iuxzJhtpdQrWHKqG&code_challenge=L2KNF971_Izy0wWY4v_8GJ1XXXXXXXXXXXX&code_challenge_method=S256&nonce=b448a1420a781ac5f18bc2db7f74e06a42fbedca3dd04ebdXXXXXXXXXXXX&client_info=1
In this request we see all the things we covered in the second post for the protocol primer. There is the redirect URI that the user will be redirected to after authenticating to Entra ID, the response_type indicating this is the authorization code grant type, the client id of my application, the state property used to mitigate CSRF attacks, the nonce to prevent replay attacks, and the code challenge and code challenge method for PKCE.
Now one thing to note is you’ll find a lot of samples on the wider Internet for MSAL (and likely generated by LLMs if you’re one of those vibe coders) that will use the acquire_token_for_client method (like this Microsoft sample here). This method WILL NOT use PKCE. If you want to include the code challenge and code verifier for PKCE you will need to use the initiate_auth_code_flow method.
The scopes query perimeter includes the Microsoft Graph User.Read permission, offline_access (for a refresh token), openid (for an id token), and profile (for access to the user’s basic profile for OIDC). The code in my app specifically requests User.Read, the remaining scopes are automatically added by MSAL for each request depending on the method you’re calling. Most documentation out there will tell you that you can’t exclude them, but you actually can using the exclude_scopes property.
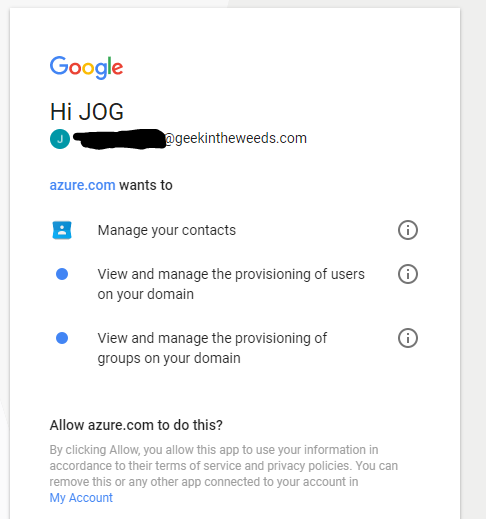
My user completes the authentication process and the user is then prompted to consent to the application’s service principal to be delegated the requested scopes. Once the user accepts, the user’s consent is saved in Entra ID and the user is no longer required to consent moving forward. You’ll notice my application says app is unverified because it’s using localhost. For anything remotely relating to production, you should configure a publishing domain and validate it.
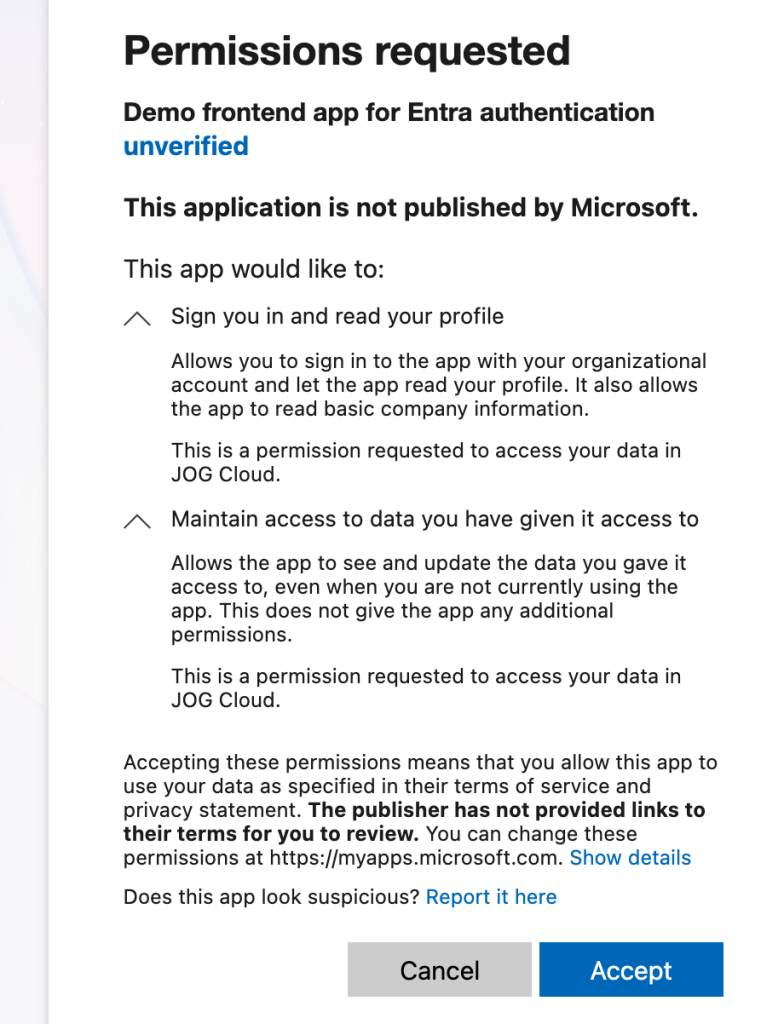
Once the user consents, the user is redirected to the redirect uri registered for the application with an authorization code generated by Entra ID. My application then makes a call to the /oauth2/v2.0/token endpoint in Entra to exchange the authorization code for an access token, identity token, and refresh token. It provides its client secret to authenticate itself to Entra and the code_verifier value allowing Entra to validate this is the original client who requested the access token (PKCE).
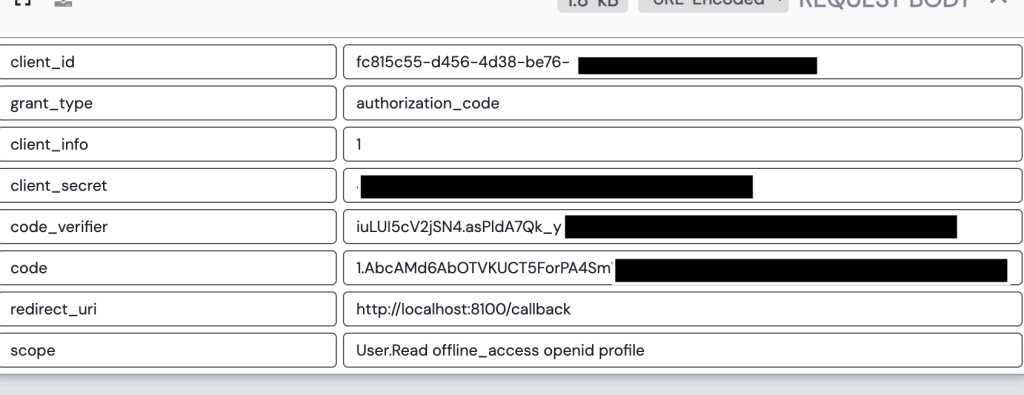
Entra validates the client secret and code verifier and if valid returns an access token, refresh token, and id token. My application can use the id token to authenticate the user and grant it access to the application.
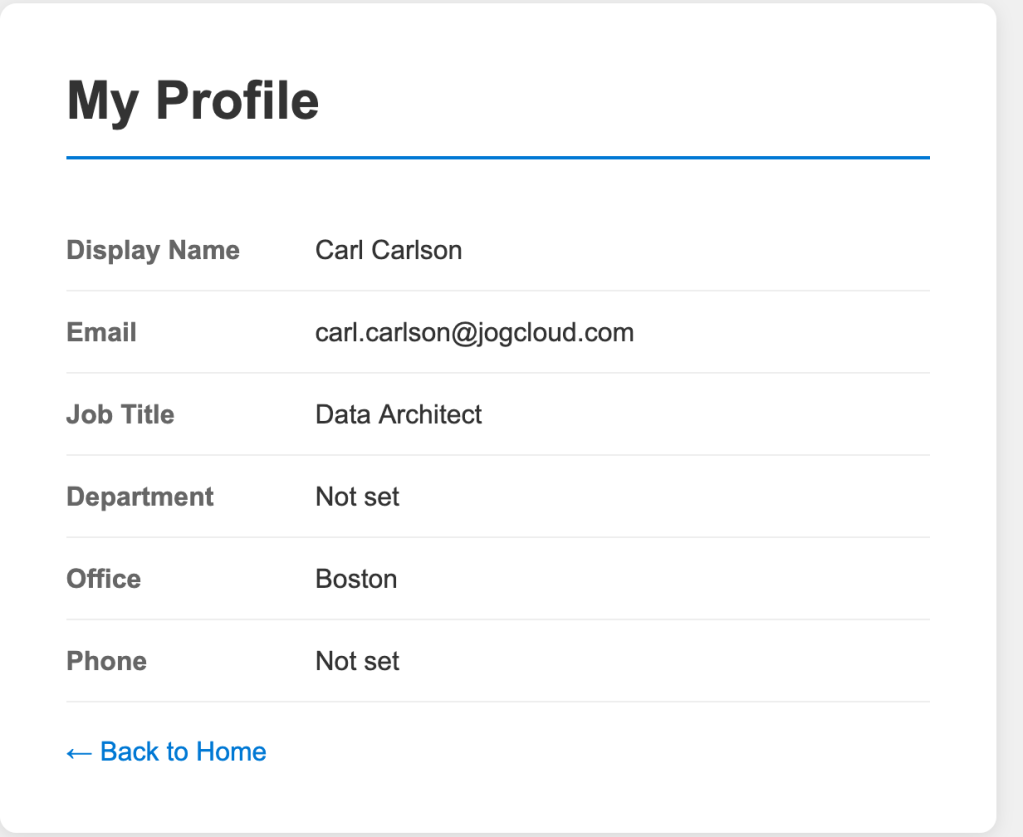
Once logged in, I navigate to the profile page of the application. This page has basic profile information about the user collected from the get user endpoint in the Microsoft Graph.
Navigating to the tokens page of the application displays the decoded access token and id token. In the payload of the id token we can see this id token is intended for the application (which you must validate in your code to ensure someone isn’t trying to pass you some rando token meant for another application) via the aud claim. We also get some basic information about the user. The full schema of the id token is in the official public docs. Some of the helpful properties are the user’s full name and their object id (oid). The object id could be used to pull additional information about the user (which we’ll see next post). We can also stuff additional claims in this id token if we wanted to. I’ll demonstrate this in a future post where I add a user’s group memberships into the id token.
{ "aud": "fc815c55-d456-4d38-be76-XXXXXXXXXXXX", "exp": 1782358405, "iat": 1782354505, "iss": "https://login.microsoftonline.com/6c80de31-d5e4-4029-93e4-XXXXXXXXXXXX/v2.0", "name": "Carl Carlson", "nbf": 1782354505, "nonce": "19297055204c96a487b701f62890cf1c867a7fac55814081f53cbe4XXXXXXXX", "oid": "2e69d9f2-b5b3-482b-9c15-XXXXXXXXXXXX", "preferred_username": "carl.carlson@jogcloud.com", "rh": "1.AbcAMd6AbOTVKUCT5ForPA4SmVVcgfxW1XXXXXXXXXXXX", "sid": "005f65fa-bad8-71a5-49eb-XXXXXXXXXXXX", "sub": "p9RBIgpi113pdPH37Q50qylIbANwgMtDXXXXXXXXXXXX", "tid": "6c80de31-d5e4-4029-93e4-XXXXXXXXXXXX", "uti": "tL2-eu4OB0KFhXGl7j4UAA", "ver": "2.0"}
The end-to-end flow
So I’ve authenticated my user to the application using OIDC and gained delegated access to the Microsoft Graph API via OAuth all using Entra. Not too shabby. This is the most basic of basic use cases. In my next post I’ll walk you through how to add group information to the id or access token which you could use within your application to authorize the user within the application.
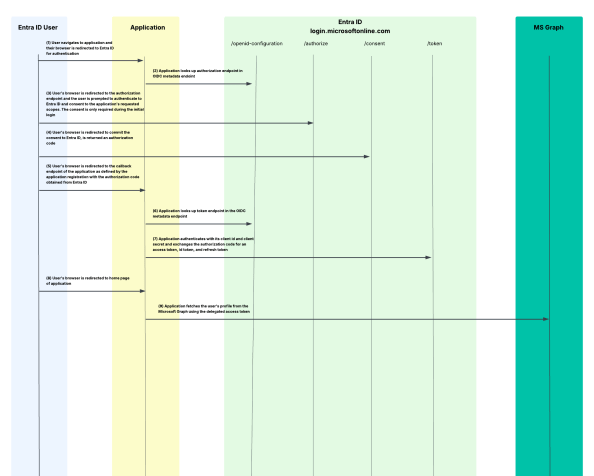
I’m a big fan of old school style protocol flow diagrams, so I threw one together that walks through the end-to-end process I’ve outlined today.
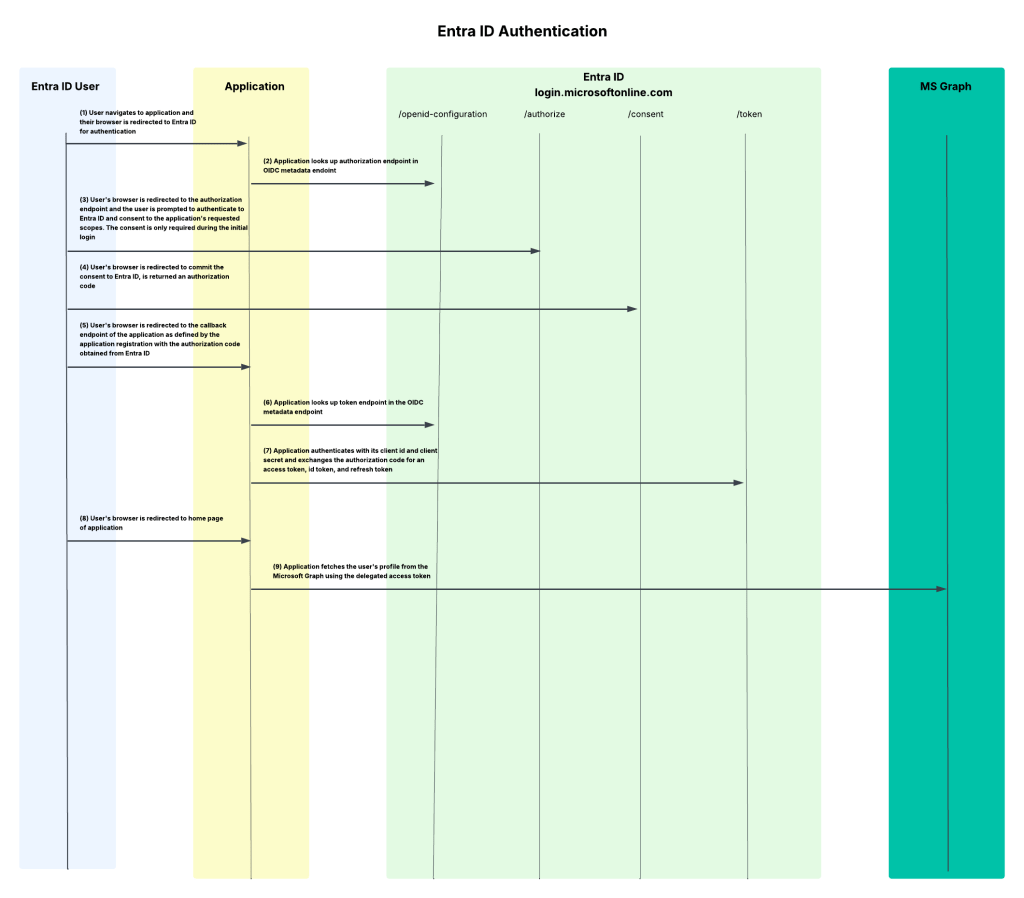
Summing It Up
Yeah, I know that was a lot. If all you take out of this post is a better understanding of what app registrations and service principals do and have a general understanding of how they’re structured, and what the protocol flow looks like when using Entra ID for OIDC/OAuth, that’s a win.
If you want to muck around with this stuff yourself in a personal or test tenant, I’ve published all the code I put together to run through these posts in this repository. It’s a work in progress which I’m fine-tuning as I write these posts but it does have the sample frontend app included in it if you want to take a glance at my application-level code and perhaps want to replicate what I walked through today. Please do not use any of this code in a production app. This is purely intended to demonstrate the concepts. I’m constantly modifying it, so YMMV if it works any given day.
Some key takeaways for you:
- Every app registration should have an owner. Just be aware the owner can modify the app registration so don’t go nuts and give this to a non-privileged user.
- Set the servericeManagementReference property to some type of BU-level distribution list. This will cover you in case the owners are wiped out through someone accidentally removing them or them leaving the company.
- Make sure you’re using the correct methods in the MSAL library if your goal is to use PKCE to align with OAuth 2.1.
- If you setup an app registration, be a good human being and document the permissions the app is going to require. You’re not required to, it should be a must for multi-tenant applications especially. It doesn’t limit what users and administrators can grant the application, but can act as minimum set of permissions to function.
- When configuring an app registration that will be a confidential client, try to use a federated identity credential. If your app is running in Azure, you can use a managed identity. This will both be more secure and make your app owner’s life a little less miserable having to rotate credentials.
See you next post!