
Hi everyone,
Welcome to the second post in my series on the integration between Azure Active Directory (Azure AD) and Google’s G-Suite (formally named Google Apps). In my first entry I covered the single sign-on (SSO) integration between the two solutions. This included a brief walkthrough of the configuration and an explanation of how the SAML protocol is used by both solutions to accomplish the SSO user experience. I encourage you to read through that post before you jump into this.
So we have single sign-on between Azure AD and G-Suite, but do we still need to provision the users and group into G-Suite? Thanks to Google’s Directory Application Programming Interface (API) and Azure Active Directory’s (Azure AD) integration with it, we can get automatic provisioning into G-Suite . Before I cover how that integration works, let’s take a deeper look at Google’s Cloud Platform (GCP) and its API.
Like many of the modern APIs out there today, Google’s API is web-based and robust. It was built on Google’s JavaScript Object Notation (JSON)-based API infrastructure and uses Open Authorization 2.0 (OAuth 2.0) to allow for delegated access to an entities resources stored in Google. It’s nice to see vendors like Microsoft and Google leveraging standard protocols for interaction with the APIs unlike some vendors… *cough* Amazon *cough*. Google provides software development kits (SDKs) and shared libraries for a variety of languages.
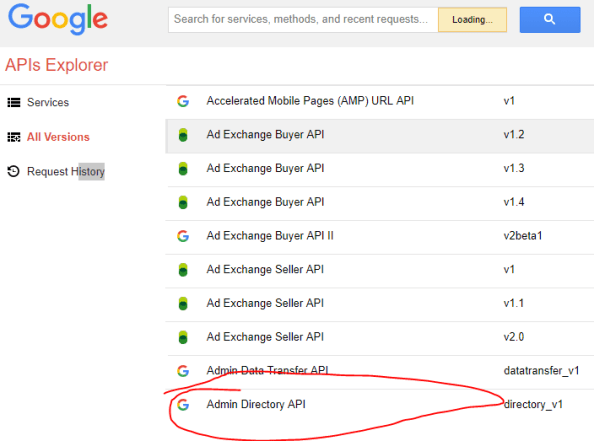
Let’s take a look at the API Explorer. The API Explorer is a great way to play around with the API without the need to write any code and to get an idea of the inputs and outputs of specific API calls. I’m first going to do something very basic and retrieve a listing of users in my G-Suite directory. Once I access the API explorer I hit the All Versions menu item and select the Admin Directory API.
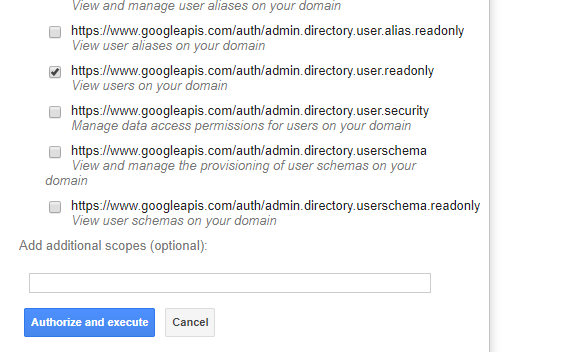
On the next screen I navigate down to the directory.users.list method and select it. On the screen that follows I’m provided with a variety of input fields. The data I input into these fields will affect what data is returned to me from the API. I put the domain name associated with my G-Suite subscription and hit the Authorize and Execute button. A new window pops up which allows me to configure which scope of access I want to grant the API Explorer. I’m going to give it just the scope of https://www.googleapis.com/auth/admin.directory.user.readonly.
I then hit the Authorize and Execute button and I’m prompted to authenticate to Google and delegate API Explorer to access data I have permission to access in my G-Suite description. Here I plug in the username and password for a standard user who isn’t assigned to any G-Suite Admin Roles.

After successfully authenticating, I’m then prompted for consent to delegate API Explorer to view the users configured in the user’s G-Suite directory.

I hit the allow button, the request for delegated access is complete, and a listing of users within my G-Suite directory are returned in JSON format.

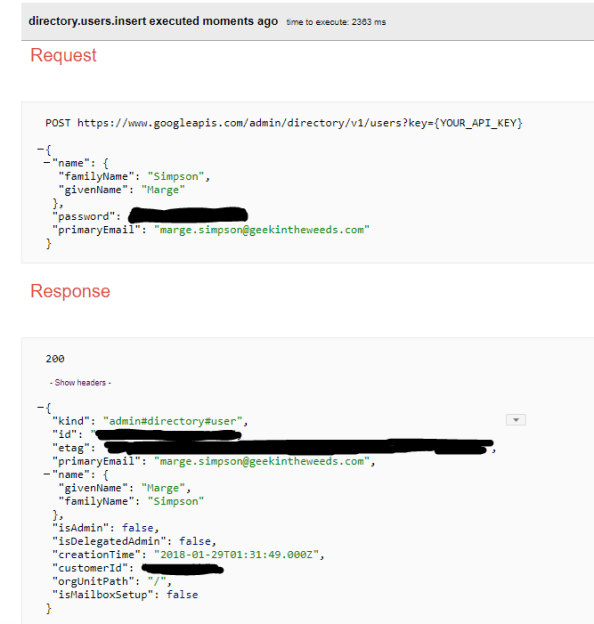
Easy right? How about we step it up a notch and create a new user. For that operation I’ll be delegating access to API Explorer using an account which has been granted the G-Suite User Management Admin role. I navigate back to the main list of methods and choose the directory.users.insert method. I then plug in the required values and hit the Authorize and Execute button. The scopes menu pops up and I choose the https://www.googleapis.com/auth/admin.directory.user scope to allow for provisioning of the user and then hit the Authorize and Execute button. The request is made and a successful response is returned.
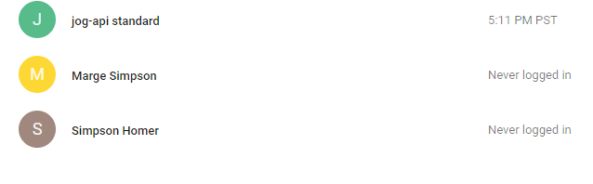
Navigating back to G-Suite and looking at the listing of users shows the new user Marge Simpson as appearing as created.
Now that we’ve seen some simple samples using API Explorer let’s talk a bit about how you go about registering an application to interact with Google’s API as well as covering some basic Google Cloud Platform (GCP) concepts.
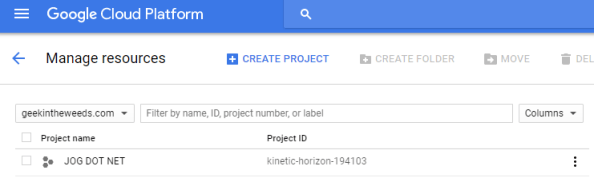
First thing I’m going to do is navigate to Google’s Getting Started page and create a new project. So what is a project? This took a bit of reading on my part because my prior experience with GCP was non-existent. Think of a Google Project like an Amazon Web Services (AWS) account or a Microsoft Azure Subscription. It acts as a container for billing, reporting, and organization of GCP resources. Projects can be associated with a Google Cloud Organization (similar to how multiple Azure subscriptions can be associated with a single Microsoft Azure Active Directory (Azure AD) tenant) which is a resource available for a G-Suite subscription or Google Cloud Identity resource. The picture below shows the organization associated with my G-Suite subscription.
Now that we have the concepts out of the way, let’s get back to the demo. Back at the Getting Started page, I click the Create a new project button and authenticate as the super admin for my G-Suite subscription. I’ll explain why I’m using a super admin later. On the next screen I name the project JOG-NET-CONSOLE and hit the next button.

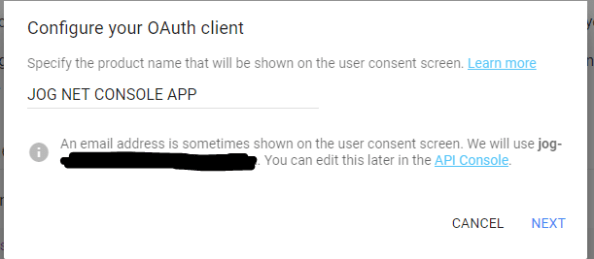
The next screen prompts me to provide a name which will be displayed to the user when the user is prompted for consent in the instance I decide to use an OAuth flow which requires user consent.
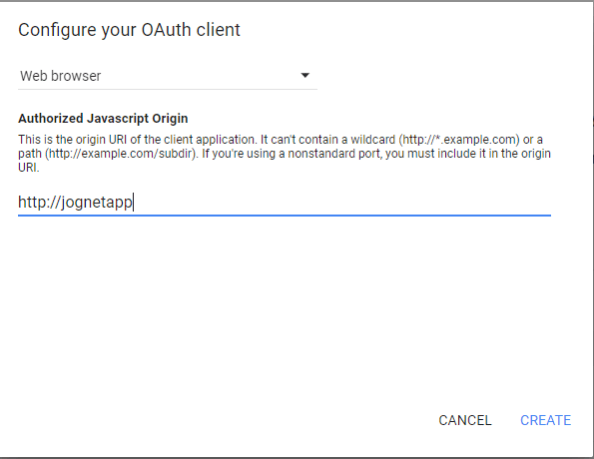
Next up I’m prompted to specify what type of application I’m integrated with Google. For this demonstration I’ll be creating a simple console app, so I’m going to choose Web Browser simply to move forward. I plug in a random unique value and click Create.
After creation is successful, I’m prompted to download the client configuration and provided with my Client ID and Client Secret. The configuration file is in JSON format that provides information about the client’s registration and information on authorization server (Google’s) OAuth endpoints. This file can be consumed directly by the Google API libraries when obtaining credentials if you’re going that route.

For the demo application I’m building I’ll be using the service account scenario often used for server-to-server interactions. This scenario leverages the OAuth 2.0 Client Credentials Authorization Grant flow. No user consent is required for this scenario because the intention of the service account scenario is it to access its own data. Google also provides the capability for the service account to be delegated the right to impersonate users within a G-Suite subscription. I’ll be using that capability for this demonstration.
Back to the demo…
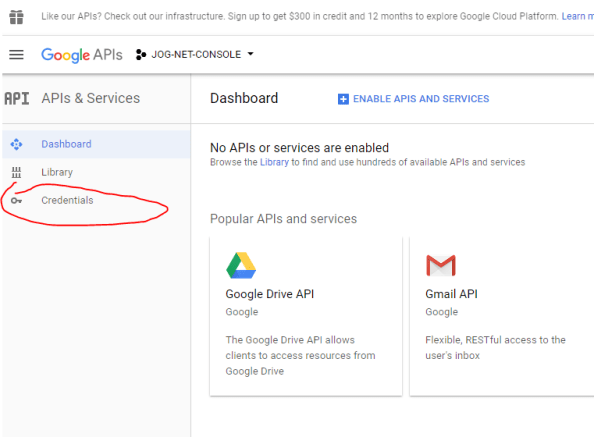
Now that my application is registered, I now need to generate credentials I can use for the service account scenario. For that I navigate to the Google API Console. After successfully authenticating, I’ll be brought to the dashboard for the application project I created in the previous steps. On this page I’ll click the Credentials menu item.
The credentials screen displays the client IDs associated with the JOG-NET-CONSOLE project. Here we see the client ID I received in the JSON file as well as a default one Google generated when I created the project.

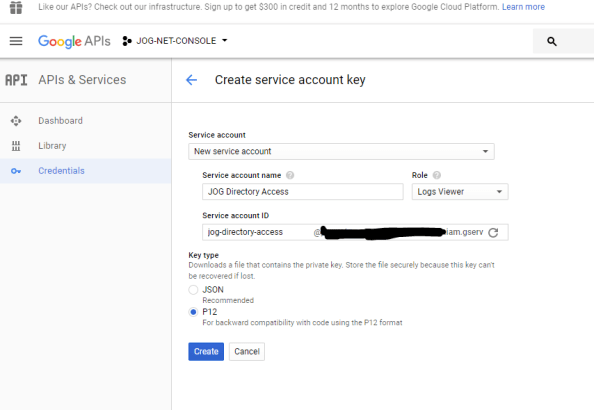
Next up I click the Create Credentials button and select the Service Account key option. On the Create service account key page I provide a unique name for the service account of Jog Directory Access.
The Role drop down box relates to the new roles that were introduced with Google’s Cloud IAM.
You can think of Google’s Cloud IAM as Google’s version of Amazon Web Services (AWS) IAM or Microsoft’s Azure Active Directory in how the instance is related to the project which is used to manage the GCP resources. When a new service account is created a new security principal representing the non-human identity is created in the Google Cloud IAM instance backing the project.
Since my application won’t be interacting with GCP resources, I’ll choose the random role of Logs Viewer. When I filled in the service account name the service account ID field was automatically populated for me with a value. The service account ID is unique to the project and represents the security principal for the application. I choose the option to download the private key as a PKCS12 file because I’ll be using the System.Security.Cryptography.X509Certificates namespace within my application later on. Finally I click the create button and download the PKCS12 file.
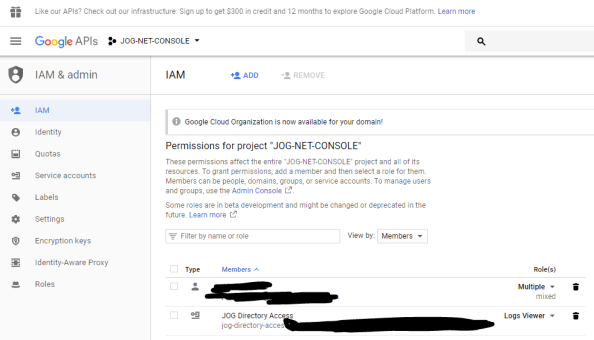
The new service account now shows in the credential page.

Navigating to the IAM & Admin dashboard now shows the application as a security principal within the project.
I now need to enable the APIs in my project that I want my applications to access. For this I navigate to the API & Services dashboard and click the Enable APIs and Services link.

On the next page I use “admin” as my search term, select the Admin SDK and click the Enable button. The API is now enabled for applications within the project.
From here I navigate down to the Service accounts page and edit the newly created service account.

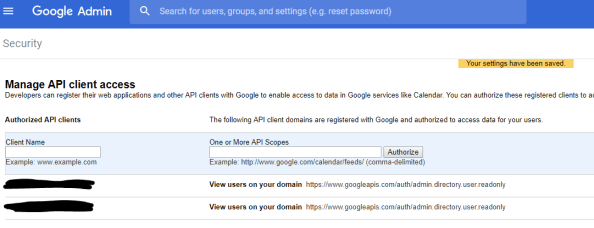
At this point I’ve created a new project in GCP, created a service account that will represent the demo application, and have given that application the right to impersonate users in my G-Suite directory. I now need to authorize the application to access the G-Suite’s data via Google’s API. For that I switch over to the G-Suite Admin Console and authenticate as a super admin and access the Security dashboard. From there I hit the Advanced Setting option and click the Manage API client access link.

On the Manage API client access page I add a new entry using the client ID I pulled previously and granting the application access to the https://www.googleapis.com/auth/admin.directory.user.readonly scope. This allows the application to impersonate a user to pull a listing of users from the G-Suite directory.
Whew, a lot of new concepts to digest in this entry so I’ll save the review of the application for the next entry. Here’s a consumable diagram I put together showing the relationship between GCP Projects, G-Suite, and a GCP Organization. The G-Suite domain acts as a link to the GCP projects. The G-Suite users can setup GCP projects and have a stub identity (see my first entry LINK) provisioned in the project. When an service account is created in a project and granted G-Suite Domain-wide Delegation, we use the Client ID associated with the service account to establish an identity for the app in the G-Suite domain which is associated with a scope of authorized access.

In this post I covered some basic GCP concepts and saw that the concepts are very similar to both Microsoft and AWS. I also covered the process to create a service account in GCP and how all the pieces come together to programmatic access to G-Suite resources. In my next entry I’ll demo some simple .NET applications and walk through the code.
Have a great weekend and go Pats!

Hi Matt, do you know how to do the provisioning the other way around? We have already 200 active GSuite users and want to provision/federate them to Azure AD without causing too much disruptions.
Thanks
LikeLiked by 1 person
Hi Tom,
I’be had that question posed a lot! Out of curiosity, are you migrating to O365 or just looking to leverage Azure AD as an Identity-as-a-Service?
LikeLike
Thanks for coming back Matt!
We want to keep Google as Identity Provider. And provision the accounts to Azure AD, so people can log to their Windows machines using their email addresses. Of course, Microsoft’s intention is to take over identity provider role, but we don’t want that, we are used to Google and want to stay there.
One possible way, that we are testing at the moment, is to provision Google accounts to Office365 – this is natively supported by Google – and then hoping the accounts will show up in Azure AD that comes with Office365.
LikeLiked by 1 person
Hi Tom. Use case makes perfect sense. Any chance you can link me to the provisioning method you are using to populate accounts for O365? I’m curious as to whether it’s provisioning actual member accounts or guest accounts in Azure AD.
LikeLike
What would be the difference? Here’s the link: https://support.google.com/a/answer/7365072?hl=en
LikeLike
This link explains the differences between the two (https://docs.microsoft.com/en-us/azure/active-directory/fundamentals/users-default-permissions). The short of it is it has to do with the default permissions the user inherits in Azure AD.
The Google documentation is scarce on details, but it looks like Google has registered a multi-tenant application in Azure AD. The authorization step provisions an identity for the application in your tenant and authorizes it to specific API permissions.
It would be interesting to know what the permissions it requires, from there you could make a good guess of how the identities are provisioned.
Without knowing the details, seems like a fairly reasonable way to go about it when G-Suite is your authoritative identity solution.
Thanks for the link Tom, got to learn something new!
LikeLike
We are in the process of implementing it in the upcoming week. If you are interested, I could let you know how it went and if we finally reached out to our goal, which managing identities with Google and being able to log into Windows machines with Google accounts.
LikeLiked by 1 person
Def interested in if you can achieve that final piece. I’m assuming you are looking to use Azure AD Domain Services?
LikeLike
I’ve always appreciated how Google leverages standard protocols like OAuth 2.0.
LikeLike