This is part of my series on GenAI Services in Azure:
- Azure OpenAI Service – Infra and Security Stuff
- Azure OpenAI Service – Authentication
- Azure OpenAI Service – Authorization
- Azure OpenAI Service – Logging
- Azure OpenAI Service – Azure API Management and Entra ID
- Azure OpenAI Service – Granular Chargebacks
- Azure OpenAI Service – Load Balancing
- Azure OpenAI Service – Blocking API Key Access
- Azure OpenAI Service – Securing Azure OpenAI Studio
- Azure OpenAI Service – Challenge of Logging Streaming ChatCompletions
- Azure OpenAI Service – How To Get Insights By Collecting Logging Data
- Azure OpenAI Service – How To Handle Rate Limiting
- Azure OpenAI Service – Tracking Token Usage with APIM
- Azure AI Studio – Chat Playground and APIM
- Azure OpenAI Service – Streaming ChatCompletions and Token Consumption Tracking
- Azure OpenAI Service – Load Testing
Hello geeks! Yes, I’m back with yet another post on the Azure OpenAI Service. There always seems to be more cool stuff to talk about with this service that isn’t specific to the models themselves. If you follow this blog, you know I’ve spent the past year examining the operational and security aspects of the service. Through trial and error and a ton of discussions with S500 customers across all industries, I’ve learned a ton and my goal has to be share back those lessons learned with the wider community. Today I bring you more nuggets of useful information.
Like any good technology nerd, I’m really nosey. Over the years I’ve learned about all the interesting information web-based services return the response headers and how useful this information can be to centrally capture and correlate to other pieces of logging information. These headers could include things like latency, throttling information, or even usage information that can be used to correlate the costs of your usage of the service. While I had glanced at the response headers from the Azure OpenAI Service when I was doing my work on the granular chargeback and streaming ChatCompletions posts, I hadn’t gone through the headers meticulously. Recently, I was beefing up Shaun Callighan’s excellent logging helper solution with some additional functionality I looked more deeply at the headers and found some cool stuff that was worth sharing.
How to look at the headers (skip if you don’t want to nerd out a bit)
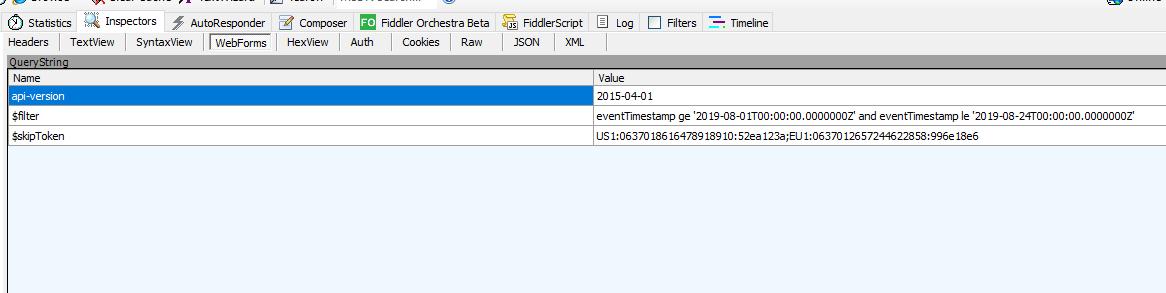
My first go to whenever examining a web service is to power up Fiddler and drop it in between my session and the web service. While this works great on a Windows or MacOS box when you can lazily drop the Fiddler-generated root CA (certificate authority) into whatever certificate store your browser is using to draw its trusted CAs from, it’s a bit more work when conversing with a web service through something like Python. Most SDKs in my experience use the requests module under the hood. In that case it’s a simple matter of passing a kwarg some variant of the option to disable certificate verification in the requests module (usually something like verify=false) like seen below in the azure.identity SDK.
from azure.identity import DefaultAzureCredential, get_bearer_token_provider

try:
    token_provider = get_bearer_token_provider(
        DefaultAzureCredential(
            connection_verify=False
        ),
        "https://cognitiveservices.azure.com/.default",
    )
except:
    logging.error('Failed to obtain access token: ', exc_info=True)
Interestingly, the Python openai SDK does not allow for this. Certificate verification cannot be disabled with an override. Great security control from the SDK developers, but no thought of us lazy folks. The openai SDK uses httpx under the hood, so I took the nuclear option and disabled verification of certificates in the module itself. Obviously a dumb way of doing it, but hey lazy people gotta lazy. If you want to use Fiddler, be smarter than me and use one of the methods outlined in this post to trust the root CA generated by Fiddler.
All this to get the headers? Well, because I like you, I’m going to show you a far easier way to look at these headers using the native openai SDK.
The openai SDK doesn’t give you back the headers by default. Instead the response body is parsed neatly for you and a new object is returned. Thankfully, the developers of the library put in a way to get the raw response object back which includes the headers. Instead of using the method chat.completions.create you can use chat.completions.with_raw_response.create. Glancing at the SDK, it seems like all methods supported by both the native client and AzureOpenAI client support the with_raw_response method.
def get_raw_chat_completion(client, deployment_name, message):
    response = client.chat.completions.with_raw_response.create(
    model=deployment_name,
    messages= [
        {"role":"user",
         "content": message}
    ],
    max_tokens=1000,
    )

    return response
Using this alternative method will save you from having to mess with the trusted certificates as long as you’re good with working with a text-based output like the below.
Headers({'date': 'Fri, 17 May 2024 13:18:21 GMT', 'content-type': 'application/json', 'content-length': '2775', 'connection': 'keep-alive', 'cache-control': 'no
-cache, must-revalidate', 'access-control-allow-origin': '*', 'apim-request-id': '01e06cdc-0418-47c9-9864-c914979e9766', 'strict-transport-security': 'max-age=3
1536000; includeSubDomains; preload', 'x-content-type-options': 'nosniff', 'x-ms-region': 'East US', 'x-ratelimit-remaining-requests': '1', 'x-ratelimit-remaini
ng-tokens': '1000', 'x-ms-rai-invoked': 'true', 'x-request-id': '6939d17e-14b2-44b7-82f4-e751f7bb9f8d', 'x-ms-client-request-id': 'Not-Set', 'azureml-model-sess
ion': 'turbo-0301-57d7036d'})
This can be incredibly useful if you’re dropped some type of gateway, such as an APIM (API Management) instance in front of the OpenAI instance for load balancing, authorization, logging, throttling etc. If you’re using APIM, you can my buddy Shaun’s excellent APIM Policy Snippet to troubleshoot a failing APIM policy. Now that I’ve given you a workaround to using Fiddler, I’m going to use Fiddler to explore these headers for the rest of the post because I’m lazy and I like a pretty GUI sometimes.
Examining the response headers and correlating data to diagnostic logs
Here we can see the response headers returned from a direct call to the Azure OpenAI Service.

The headers which should be of interest to you are the x-ms-region, x-ratelimit-remaining-requests, x-ratelimit-remaining-tokens, and x-request-id. The x-ms-region is the region where the Azure OpenAI instance you called is located (I’ll explain why this can be useful in a bit). The x-ratelimit headers tell you how close you are to hitting rate limits on a specific instance of a model in an AOAI instance. This is where load balancing and provisioned throughput units can help mitigate the risk of throttling. The load balancing headers are still important to your application devs to pay attention to and account for even if you’re load balancing across multiple instances because load balancing mitigates but doesn’t eliminate the risk of throttling. The final interesting header is the apim-request-id which is the unique identifier of this specific request to the AOAI service. If you’re wondering, yes it looks like the product group has placed the compute running the models behind an instance of Azure API Management.
Let’s first start with the apim-request-id response header. This header is useful because it can be used to correlate a specific request it’s relevant entry in the native diagnostic logging for the Azure OpenAI Service. While I’ve covered the limited use of the diagnostic logging within the service, there are some good nuggets in there which I’ll cover now.
Using the apim-request-id, I can make a query to wherever I’m storing the diagnostic logs for the AOAI instance to pull the record for the specific request. In my example I’m using a Log Analytics Workspace. Below you can see my Kusto query which pulls the relevant record from the RequestResponse category of logs.

There are a few useful pieces of information in this log entry.
- DurationMs – This field tells us how long the response took from the Azure OpenAI Service. My favorite use of this field comes when considering non-PTU-based Azure OpenAI instances. Lots of people want to use the service and the underlining models in a standard pay-as-you-go tier can get busy in certain regions at certain times. If you combine this information with the x-ms-region response header you can begin to build a picture of average response times per region at specific times of the day. If you’re load balancing, you can tweak your logic to direct your organization’s prompts to the region that has the lowest response time. Cool right?
- properties_s.streamType – This field tells you whether or not the request was a streaming-type completion. This can be helpful to give you an idea of how heavily used streaming is in your org. As I’ve covered previously, capturing streaming prompts and completions and calculating token usage can a challenge. This property can help give you an idea how heavily used it is across your org which may drive you to get a solution in place to do that calculation sooner rather than later.
- properties_s.modelName, modelVersion – More useful information to enrich the full picture of the service usage while being able to trace that information back to specific prompts and responses.
- objectId – If your developers are using Entra ID-based identities to authenticate to the AOAI service (which you should be doing and avoiding use of API keys where possible), you’ll have the objectid of the specific service principal that made the request.
Awesome things you can do with this information
You are likely beginning to see the value of collecting the response headers, prompt and completions from the request and respond body, and enriching that information from logging data collected from diagnostics logs. With that information you can begin getting a full picture of how the service is being used across your organization.
Examples include:
- Calculating token usage for organizational chargebacks
- Optimizing the way you load balance to take advantage of less-used regions for faster response times
- Making troubleshooting easier by being able to trace a specific response back to which instance it, the latency, and the prompt and completion returned by the API.
There are a ton of amazing things you can do with this data.
How the hell do you centrally collect and visualize this data?
Your first step should be to centrally capturing this data. You can use the APIM pattern that is quite popular or you can build your own solution (I like to refer to this middle tier component as a “Generative AI Gateway”. $50 says that’s the new buzzwords soon enough). Either way, you want this data captured and delivered somewhere. In my demo environment I deliver the data to an Event Hub, do a bit of transformation and dump it into a CosmosDB with Stream Analytics, and the visualize it with PowerBI. An example of the flow I use in my environment is below.

The possibilities for the architecture are plentiful, but the value of this data to operations, security, and finance is worth the effort to assemble something in your environment. I hope this post helped to get your more curious about what your usage looks like and how could use this data to optimize operationally, financially, and even throw in a bit more security with more insight into what your users are doing with this GenAI models by reviewing the captured prompts and responses. While there isn’t a lot of regulation around the use of GenAI yet, it’s coming and by capturing this information you’ll be ready to tackle it.
Thanks for reading!