Updates:
7/2025 – Removed bullet point highlighting lack of DNS query logging and added that this can be achieved with DNS Security Policy
This is part of my series on DNS in Microsoft Azure.
- DNS in Microsoft Azure – Azure-provided DNS
- DNS in Microsoft Azure – Azure Private DNS
- DNS in Microsoft Azure – Azure Private DNS Resolver
- DNS in Microsoft Azure – PrivateLink Private Endpoints
- DNS in Microsoft Azure – PrivateLink Private Endpoints and Private DNS
- DNS in Microsoft Azure – Private DNS Fallback
- DNS in Microsoft Azure – DNS Security Policies
Welcome back fellow geek to part two of my series on DNS in Azure. In the first post I covered some core concepts behind the DNS offerings in Azure. One of the core concepts was the 168.63.129.16 virtual IP address which serves as a mechanism for services within an Azure Virtual Network to communicate with platform services such as the Azure DNS Service. I also covered the basic DNS offering, Azure-provided DNS. For this post I’m going to cover the Azure Private DNS service.
Azure-provided DNS may serve your needs if you’re doing basic proof-of-concept testing, but not much use beyond that. The limited capabilities around supported record types and scaling challenges when requiring resolution across virtual networks make it a non-starter for anything with production-scale needs Prior to Azure Private DNS, customers were forced to roll their own DNS servers to host any private namespaces they wanted to use in Azure. Programmatic management of records in traditional DNS servers can be limited, making it challenging to balance with the ephemeral nature of the cloud.
Microsoft introduced Azure Private DNS into public preview back in early 2018 to help address these problems. The service officially went general availability in October 2019. It addresses many of the gaps Azure-provided DNS has such as support for:
- Custom DNS namespaces
- Manually created records
- Common DNS record types such as A, MX, CNAME, PTR
- Automatic lifecycle management of DNS records for some Azure resources such as virtual machines
- DNS namespaces can be shared across virtual networks
Before we jump into the weeds, we’ll first want to cover the basic concepts of the service.
Azure Private DNS zones are an Azure resource under the Microsoft.Network resource provider with a path of /providers/Microsoft.Network/privateDnsZones/. Each DNS zone you want to create is represented as a separate resource. Zones created in one subscription can be used for resolution within another subscription in the same tenant or even a different tenant.
Once the Private DNS Zone is created you need to create a virtual network link to the resource. This resource is also under the Microsoft.Network resource provider and has a path of /providers/Microsoft.Network/privateDnsZones/virtualNetworkLinks/. VNets can resolve and and optionally register DNS records with the zones you create after you create a virtual network link between the VNet and the zone. Each zone can be linked to multiple VNets for registration and resolution. On other hand, VNets can be linked to multiple zones for resolution but only one zone for registration. Once a zone is linked to the VNet, resources within the VNet can resolve and/or register DNS records for those zones through the 168.63.129.16 virtual IP.
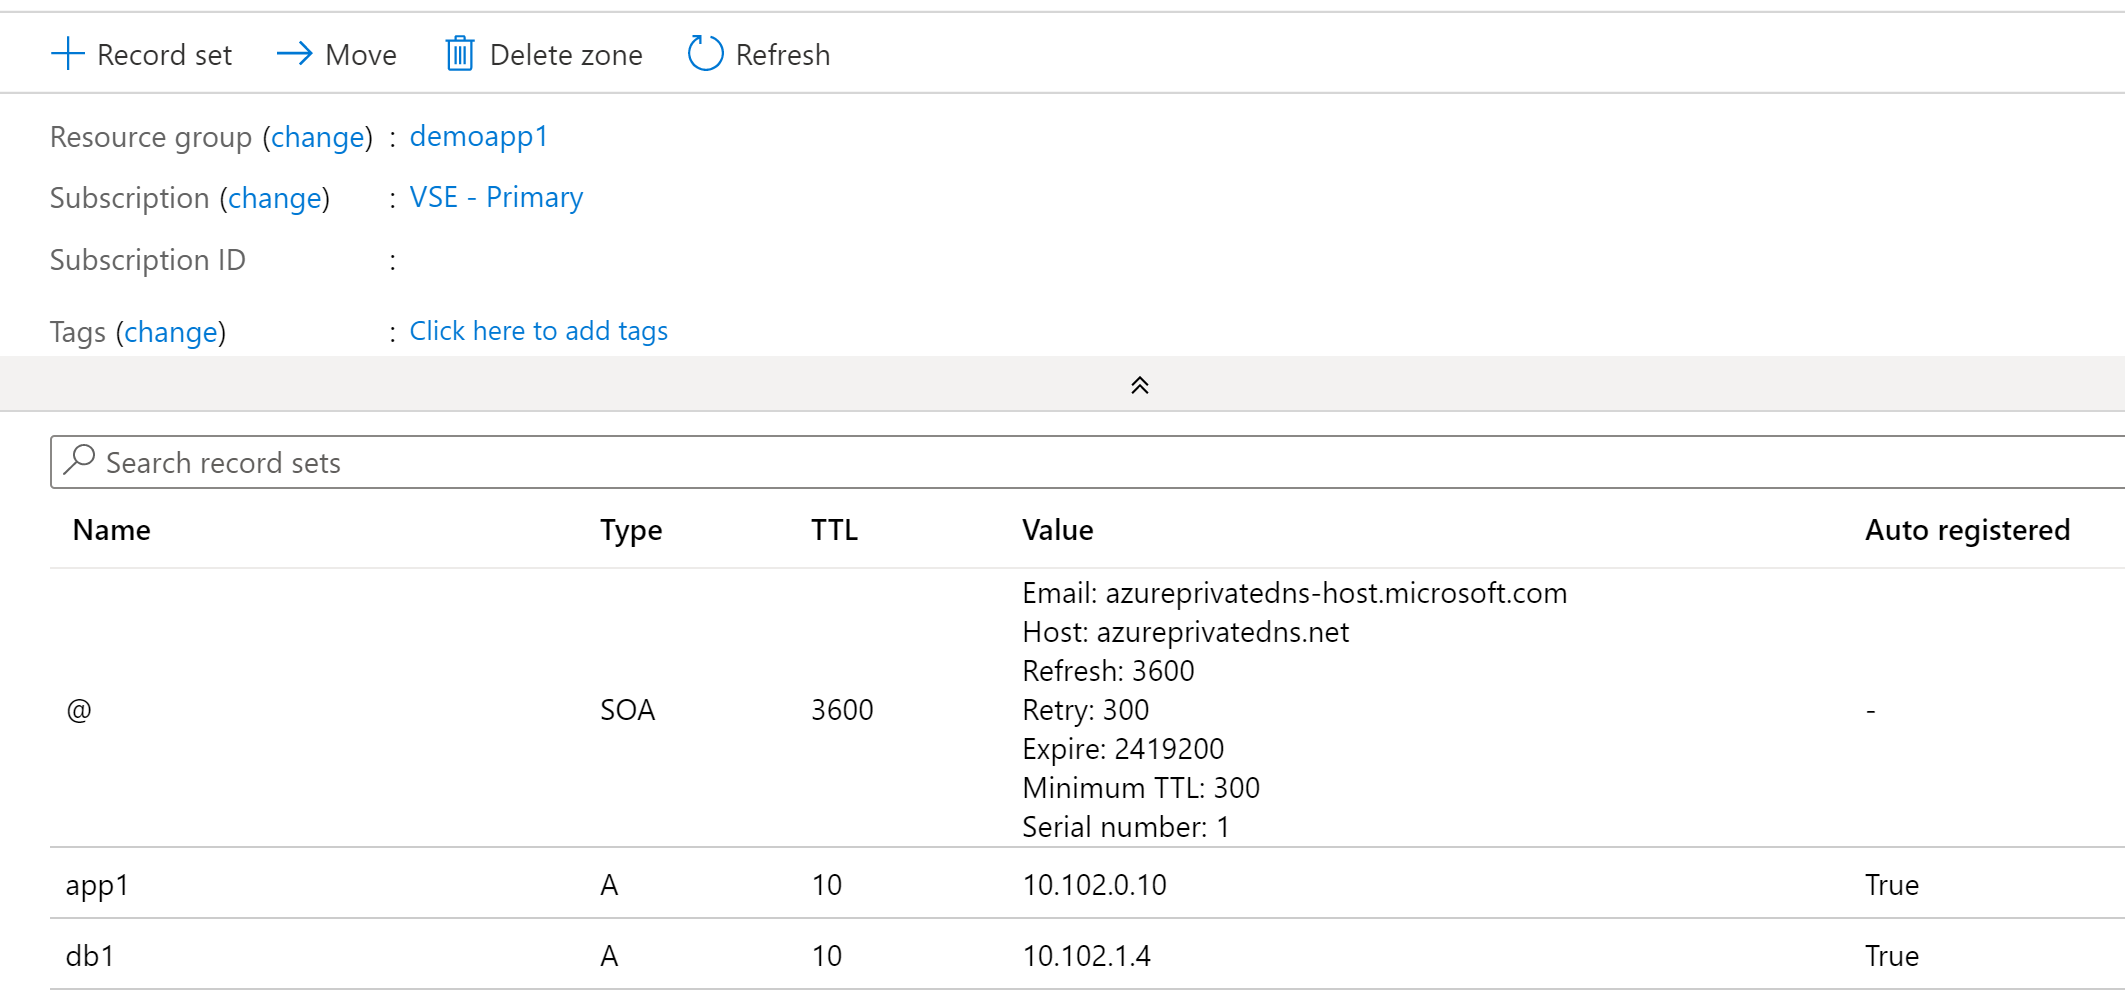
In addition to DNS resolutions, zones can be linked for auto-registration. When a virtual network is linked for auto-registration the VMs will register A records within the Azure Private DNS Zone and the Azure-provided DNS zone. There are a few things to note about the A records automatically created in the private zone:
- Each record has a property called isAutoRegistered which has a boolean value of true for any records created through the auto-registration process.
- Auto-registered records have an extremely short TTL of 10 seconds. If you have plans of performing DNS scavenging, take note of this and that these records are automatically deleted when the VM is deleted.
- Virtual networks can only be linked to one virtual network for auto-registration.
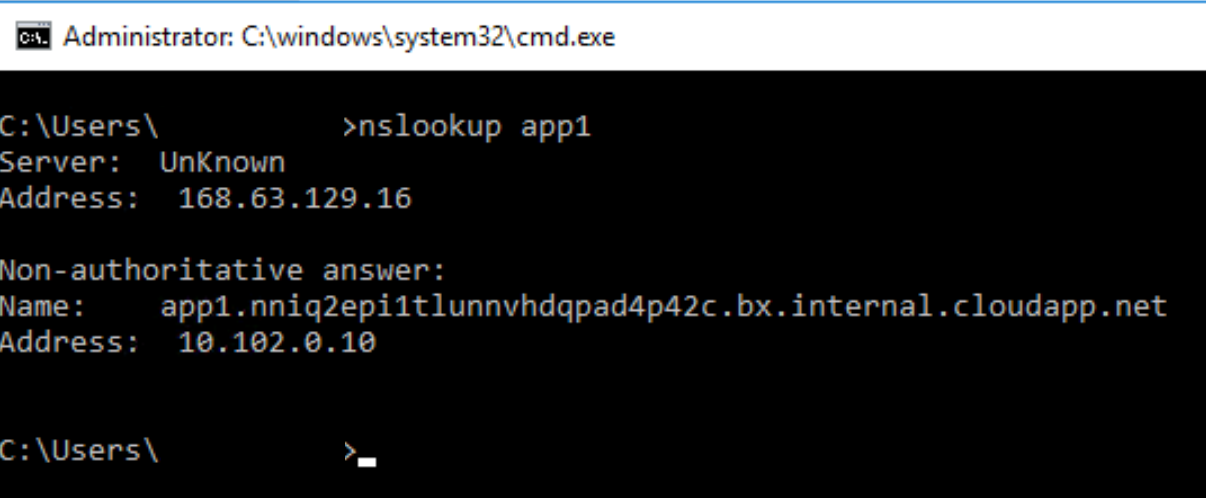
The Azure-provided DNS zone dynamically created for the VNet is still created even when linking an Azure Private DNS zone to a VNet. Additionally, if you try to resolve the IP address using a single label hostname on a Windows machine, you’ll get back the A record for the Azure-provided DNS zone as seen in the image below. This is by design and allows you to control the DNS suffix automatically appended by your VMs. It also means you need to use the FQDN in any application configuration to ensure the record is resolved correctly.
Let’s take a look at a resolution scenario.
Scenario: VM1 wants to resolve the IP address of VM3.mydomain.com
In the image below we have resolution between two virtual networks. In this scenario we have Virtual Network 1 and Virtual Network 2. Virtual Network 1 is linked for both registration and resolution to the Azure Private DNS Zone of mydomain.com. Virtual Network 2 is linked to the same zone for resolution. In this configuration, both Virtual Network 1 and Virtual Network 2 are able to resolve records in the mydomain.com Azure Private DNS Zone namespace.
Let’s walk through this query resolution process:
- VM1 creates a DNS query for vm3.mydomain.com. VM1 does not have a cached entry for vm3.mydomain.com so the query is passed on to the DNS Server configured for the VMs virtual network interface (VNIC). The DNS Server has been configured by the Azure DHCP Service to the 168.63.129.16 virtual IP which is the default configuration for virtual network DNS Server settings.
- The DNS query is passed through the virtual IP and on to the Azure-provided DNS Service. The Azure-provided DNS Service identifies there is an Azure Private DNS Zone named mydomain.com linked to the virtual network so the query is resolved against this zone and returned to VM1.

Beyond the auto-registration of records, you can also manually create a variety of record types as I mentioned above. There isn’t anything special or different in the way Azure is handling these records. The only thing worth noting is the records have a standard 1 hour TTL..
One other important thing to note about Azure Private DNS Zones is they are a global resource. This means that the data from an Azure Private DNS Zone is replicated across all Azure regions. If you have a zone linked to virtual network in regionA it can also be linked to virtual network in regionB. This is best practice. Now the caveat of being a global resource is the Private DNS Zone still needs to exist within a resource group, which is regional. In the event of a regional outage in the region where the resource group exists, you will not be able to modify the Azure Private DNS Zone. It will however continue services DNS queries for virtual networks in other regions.
Azure Private DNS Zones can be used to provide custom DNS namespaces for internally-facing applications you build within Azure. Remember that the Azure-provided DNS service cannnot be used by on-premises machines without a DNS Proxy (such as BIND server, Windows DNS Server, InfoBlox, etc) or the Azure Private DNS Resolver. This means you cannot resolve records in an Azure Private DNS Zone unless you have that in place.
An important use case for understanding Azure Private DNS Zones is they play a very important role with Azure PaaS services that support Azure Private Link Private Endpoints. For those use cases you will not be able to pick the namespace, you’ll need to use what Microsoft provides. I cover this in a later post in this series.
When using custom namespaces for applications you develop in Azure where you control the certificate the service serves up there are a few strategies you can employ:
- Separate private DNS zone for each application – In this scenario you could grant business units full control of the zone letting them manage the records as they see fit. This would improve the application team’s agility while reducing operational burden on central IT.
- Separate private DNS zones for each environment (Dev/QA/Prod) – In this scenario you establish separate zones for each environment which are shared across business units and these zones are managed by central IT.
Summing up the Azure Private DNS Zones when used with only the Azure-provided DNS Service:
- Benefits
- Managed service where you don’t have to worry the managing the underlining infrastructure
- Scalability and availability
- Use of custom DNS namespaces
- Global resource that can provide resolution for virtual networks spread across Azure regions
- Lifecycle of Azure VMs DNS records are automatically managed by the platform if using auto-registration
- Applications could be assigned their own DNS zones and application owners delegated some level control over that zone
- Azure-provided DNS can support query logging when used in combination with DNS Security Policy
- Considerations
- The records in these zones cannot be resolved by on-premises endpoints unless you incorporate a DNS Proxy (such as BIND server, Windows DNS Server, InfoBlox, etc) or the Azure Private DNS Resolver.
- While Azure Private DNS Zone resources are global the service’s control plane is regionally dependent on the region the of the resource group the zone is deployed in
- Linking the Private DNS Zones to every virtual network could risk hitting the limits of the service
- No support for WINS or NETBIOS
In my next post I’ll cover the how the Azure Private DNS Resolver builds on these two components and begins addressing some of these considerations..