Office 365 Groups Naming Policies – Part 1

Office 365 Groups Naming Policies – Part 1

Groups…  It’s a term every business user consuming technology has heard at some point in time.  Most users only experience groups when they’re unable to access a specific application or file and the coworker sitting next to them informs them they need to call IT and get added to the department group.  Those of us who work on the technology side of the fence are very familiar with the benefits groups bring to the table when controlling access to data.  We are also quite familiar with the challenges they can bring when managing them at scale.

Something as simple as a lack of an enforced naming convention can create serious pain for an organization if it relies heavily upon the naming convention to determine the function and owner of a group.  The pain bleeds through IT and into the business as workers struggle with long wait times for on-boarding new employees due to IT trying to determine which groups the users need to be in.  When it comes time to perform an access review, business owners may waste valuable time trying to determine if removing an employee from a specific group will impact that employee’s ability to fulfill their job responsibilities.

In the on-premises world organizations deal with the challenge of naming conventions in different ways.  Most rely upon first or second level help desk to create groups according to the organization’s naming standard.  This method introduces the risk of human error and presents challenges when the group information for a particular application is sourced from a variety of different identity backends which force the staff to learning multiple tools.  Others make use of identity management (IDM) systems that automate the creation of groups and enforce the naming convention.  This method is very effective but also very costly due to high costs in implementing and operating an IDM.  A very small minority of organizations have evolved to the point where the naming conventions are no longer important due to robust reporting systems and entitlement databases.

Very few organizations are able to successfully execute the third method, which leaves them with the first or second.  The introduction of the software-as-a-service (SaaS) has made the first and second methods of enforcing a naming convention much more complicated.  Using the first method of leveraging help desk staff to create the groups manually is no longer scalable and the second method of using a centralized IDM system is often limited by the vendor’s ability to write connectors to the wide variety of APIs in use across the thousands of SaaS vendors.  All is not lost, as it seems some vendors have begun to recognize the challenge this can introduce to their customers.

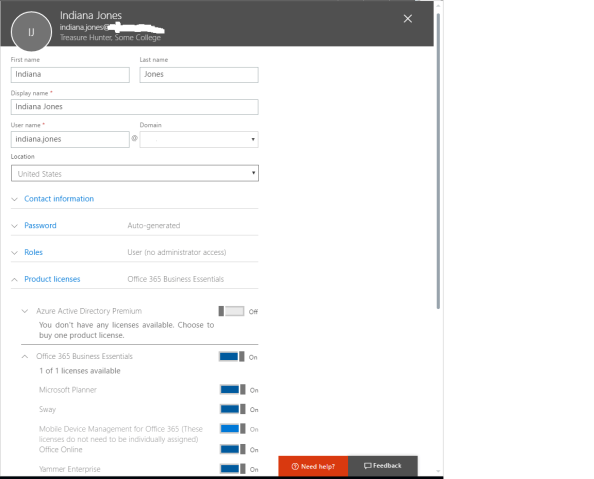
If your organization is a consumer of Office 365, you’ve more than likely begun to use Office 365 Groups.  Office 365 groups offer a variety of features not found in the traditional security/distribution group or shared mailbox.  Take a look at this link for a comparison chart that documents the features.  One important thing to note is Office 365 Groups can only be only created in Azure Active Directory (AAD).  You cannot synchronize an on-premises Active Directory Domain Services security or distribution group to AAD and convert it to an Office 365 Group.  This means you can’t leverage an existing solution for enforcing naming conventions unless that solution has a connector into Azure AD.  Given features Office 365 provide and that they are the construct used by Microsoft Teams, you may make the decision to allow your users to create Office 365 Groups on the fly in order to allow them to take full advantage of collaboration tools available in Office 365.  To quote Peter Venkman, “Human sacrifice, dogs and cats living together… mass hysteria!”.

Calm down my friend.  Microsoft has a solution coming in the pipeline that will solve your Office 365 Groups naming convention woes.  In my next post I’ll demonstrate the feature and walkthrough how to test the feature out while it is in preview.

Deep dive into AD FS and MS WAP – Overview

Hi everyone,

If you’ve followed my blog at all, you will notice I spend a fair amount of my time writing about the products and technologies powering the integration of on-premises and cloud solutions.  The industry refers to that integration using a variety of buzzwords from hybrid cloud to software defined data center/storage/networking/etc.  I prefer a more simple definition of legacy solutions versus modern solutions.

So what do I mean by a modern solution?  I’m speaking of solutions with the following most if not all of these characteristics:

  • Customer maintains only the layers of the technology that directly present business value
  • Short time to market for new features and features are introduced in a “toggle on and toggle off” manner
  • Supports modern authentication, authorization, and identity management standards and specifications such as Open ID Connect, OAuth, SAML, and SCIM
  • On-demand scaling
  • Provides a robust web-based API
  • Customer data can exist on-premises or off-premises

Since I love the identity realm, I’m going to focus on the bullet regarding modern authentication, authorization, and identity management.  For this series of posts I’m going to look at how Microsoft’s Active Directory Federation Service (AD FS)  and Microsoft’s Web Application Proxy (WAP) can be used to help facilitate the use of modern authentication and authorization.

So where does AD FS and the WAP come in?  AD FS provides us with a security token service producing the logical security tokens used in SAML, OAuth, and Open ID Connect.  Why do we care about the MS WAP?  The WAP acts a reverse proxy giving us the ability to securely expose AD FS to untrusted networks (like the Internet) so that devices outside our traditional firewalled security boundary can leverage our modern authentication and authorization solution.

Some real life business cases that can be solved with this solution are:

  1. Single sign-on (SSO) experience to a SaaS application such as SharePoint online from both an Active Directory domain-joined endpoint or a non-domain joined endpoint such as a mobile phone.
  2. Limit the number of passwords a user needs to remember to access both internal and cloud applications.
  3. Provide authentication or authorization for modernized internal applications for endpoints outside the traditional firewalled security boundary.
  4. Authentication and authorization of devices prior to accessing an internal or cloud application.

As we can see from the above, there are some great benefits around SSO, limiting user credentials to improve security and user experience, and taking our authorization to the next step by doing contextual-based authorization (device information, user location, etc) versus relying upon just Active Directory group.

Microsoft does a relatively decent job describing how to design and implement your AD FS and WAP rollout, so I’m not going to cover much of that in this series.  Instead I’m going to focus on the “behind the scenes” conversations that occur with endpoints, WAP, AD FS, AD DS, and Azure AD. Before I begin delving into the weeds of the product, I’m going to spend this post giving an overview of what my lab looks like.

I recently put together a more permanent lab consisting of a mixture of on-premise VMs running on HyperV and Azure resources.  I manage to stay well within my $150.00 MSDN balance by keeping a majority of the VMs deallocated.   The layout of the lab is diagramed below.

HomeLab


On-premises I am running a small collection of Windows Server 2016 machines within HyperV running on top of Windows Server 2016.  I’m using a standard setup of an AD DS, AD CS, AADC, AD FS, and IIS/MS SQL server.  Running in Azure I have a single VNet with three subnets each separated by a network security group.  My core infrastructure of an AD DS, IIS/MS SQL, and AD FS server exist in my Intranet subnet with my DMZ subnet containing a single WAP.

The Active Directory configuration consists of a single Active Directory forest with an FQDN of journeyofthegeek.local.  The domain has been configured with an explicit UPN of journeyofthegeek.com which is assigned as the UPN suffix for all users synchronized to Azure Active Directory.  The domain is running in Windows Server 2016 domain and forest functional level.  The on-premises domain controller holds all FSMO roles and acts as the DC for the Active Directory site representing the on-premises physical location.  The domain controller in Azure acts as the sole DC for the Active Directory site representing Azure.  Both DCs host the split-brain DNS zone for journeyofthegeek.com.

The on-premises domain controller also runs Active Directory Certificate Services.  The CA is an enterprise CA that is used to distribute certificates to security principals in the environment.  I’ve removed the CDP from the certificate templates issued by the CA to eliminate complications with the CRL revocation checking.

The AD FS servers are members of an AD FS farm named sts.journeyofthegeek.com and use a MS SQL Server 2016 backend for storage of configuration information.  The SQL Server on-premises hosts the SQL instance that the AD FS users are using to store configuration information.

Azure Active Directory Connect is co-located on the AD FS server and uses the same SQL server as the AD FS uses.  It has been integrated with a lab Azure Active Directory tenant I use which has a few licenses of Office 365 Business Essentials.  The objectGUID attribute is used as the immutable ID and the Azure Active Directory tenant has the DNS namespaces of journeyofthegeek.onmicrosoft.com and journeyofthegeek.com associated with it.

The IIS server running in Azure runs a simple .NET application (https://blogs.technet.microsoft.com/tangent_thoughts/2015/02/20/install-and-configure-a-simple-net-4-5-sample-federated-application-samapp/) that is used for claims-based authentication.  I’ll be using that application for demonstrations with the Web Application Proxy and have used it in the past to demonstrate functionality of the Azure Application Proxy.

For the demonstrations throughout these series I’ll be using the following tools:

In my next post I’ll do a deep dive into what happens behind the scenes during the registration of the Web Application Proxy with an AD FS farm.  See you then!


Azure AD User Provisioning – Part 2

Hello again. Today I will continue this series by examining the GUI options available within Microsoft’s Azure offerings to provision new user accounts. I am going to focus on member user objects and not guests for this series.

There are four native GUI options available that can be used to provision new user accounts in Azure Active Directory.

  1. Office 365 Administration Center
  2. Azure Management Portal
  3. Azure Portal
  4. ADUC/ADAC then synchronization to Azure AD

I’ll start with the Office 365 Admin Center. The Office 365 Administration Center is where most business will find themselves provisioning user accounts due to the popularity of the products under the Office 365 umbrella. The Admin Center provides an interface that is sleek and simple to navigate. The simplicity comes with a price. Administration of many aspects of Azure AD must be done outside of the Admin Center. This registering custom applications and applications from the application gallery, creation of additional directories such as B2C directories, B2B imports, and much more. Microsoft seemingly intends this interface to be business friendly administration endpoint for the Office 365 suite and rightfully assumes the consumers of this endpoint need simplicity.

I’ll now create a new user account. We first need navigate and login to the Office 365 portal. After the user authenticates the Office 365 home page that lists out the various applications the user has access to. I’ll next click on the Admin icon to enter the Admin Center. Next I will navigate to the Users section and select the Active Users section. This will bring us up a listing of the users currently in the Azure AD tenant associated with the Office 365 subscription.

pic1

When I hit the Add User button a new blade opens where the key components of the user’s account can be configured. This includes the first name, last name, user name and the like as seen in the screenshot below.

pic2

Let’s take some time to dig through the remaining sections.

First up is the contact information section. On-premise Active Directory administrators will recognize these fields from the various tabs in ADUC.

pic3

Next up is the password section. Here I have the option of creating a password or auto-generating a password and turning on or off the enforcement of a password change at first sign-in. I don’t recall there being an option to create a password a few months back when I was playing with the Admin Center, but that is one of the many lovely aspects of SaaS, continuous change and improvement.

pic4

Next up is the Roles section. Here there is an option to assign the user to the standard Azure AD roles or Office 365 roles. You can read more about these roles here.

pic5

Finally, the Licenses section allows for assignment of Azure AD and Office 365 licenses to the user account.

pic6

After the user is created it can be modified by clicking on the user object. Contact information about the user, membership into Azure AD groups, MFA enforcement, and product specific settings for the user can be modified in this blade.

pic7

The restoration of deleted users is simple and quick via the Deleted Users section. If only Microsoft had made it this easy in the old days of on-premises Active Directory prior to the Active Directory Administration Center.

pic8

Users can also be added in bulk by uploading a CSV file by hitting the More button in the Active Users section.

pic9.png

The Office 365 Admin Center interface is sleek and simple, perfect for a business user or Tier 1 support staff. So what’s the problem? No matter how simple the interface, it’s another process and interface staff need to learn. There is also no way to technically enforce standards for data input. What if what user puts MA and another puts Massachusetts? What about a user who misspells accountant in the job title field? Human error and lack of standardization can make for some nasty operational headaches, not to mention security risks. If an organization wants to limit the new processes and interfaces its staff needs to learn (because really, where is the business value in that?) as well as making sure the data about a user is standardized and correct, making these changes programmatically is the way to go.

In my next post I’ll cover both the Azure Management Portal and the Azure Portal.