Deep Dive into Azure AD and AWS SSO Integration – Part 3

Deep Dive into Azure AD and AWS SSO Integration – Part 3

Back for more are you?

Over the past few posts I’ve been covering the new integration between Azure AD and AWS SSO.  The first post covered high level concepts of both platforms and some of the problems with the initial integration which used the AWS app in the Azure Marketplace.  In the second post I provided a deep dive into the traditional integration with AWS using a non-Azure AD security token service like AD FS (Active Directory Federation Services), what the challenges were, how the new integration between Azure AD and AWS SSO addresses those challenges, and the components that make up both the traditional and the new solution.  If you haven’t read the prior posts, I highly recommend you at least read through the second post.

Azure AD and AWS SSO Integration

New Azure AD and AWS SSO Integration

In this post I’m going to get my hands dirty and step through the implementation steps to establish the SAML trust between the two platforms.  I’ve setup a fairly simple lab environment in Azure.  The lab environment consists of a single VNet (virtual network) with a four virtual machines with the following functions:

  • dc1 – Windows Active Directory domain controller for jogcloud.com domain
  • adcs – Active Directory Certificate Services
  • aadc1 – Azure Active Directory Connect (AADC)
  • adfs1 – Active Directory Federation Services

AADC has been configured to synchronize to the jogcloud.com Azure Active Directory tenant.  I’ve configured federated authentication in Azure AD with the AD FS server acting as an identity provider and Windows Active Directory as the credential services provider.

visio of lab environment

Lab Environment

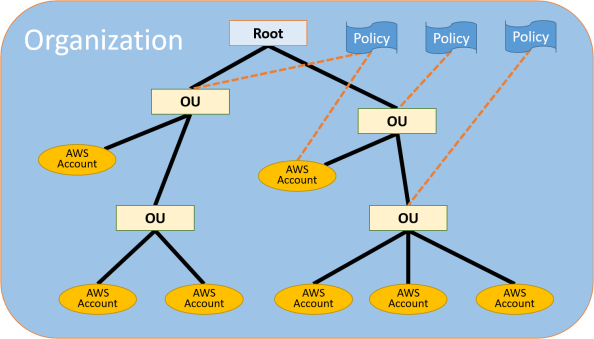
On the AWS side I have three AWS accounts setup associated with an AWS Organization.  AWS SSO has not yet been setup in the master account.

Let’s setup it up, shall we?

The first thing you’ll need to do is log into the AWS Organization master account with an account with appropriate permissions to enable AWS SSO for the organization.  If you’ve never enabled AWS SSO before, you’ll be greeted by the following screen.

1.png

Click the Enable AWS SSO button and let the magic happen in the background.  That magic is provisioning of a service-linked role for AWS SSO in each AWS account in the organization.  This role has a set of permissions which include the permission to write to the AWS IAM instance in the child account.  This is used to push the permission sets configured in AWS SSO to IAM roles in the accounts.

Screenshot of AWS SSO IAM Role

AWS SSO Service-Linked IAM Role

After about a minute (this could differ depending on how many AWS accounts you have associated with your organization), AWS SSO is enabled and you’re redirected to the page below.

Screenshot of AWS SSO successfully enabled page

AWS SSO Successfully Enabled

Now that AWS SSO has been configured, it’s time to hop over to the Azure Portal.  You’ll need to log into the portal as a user with sufficient permissions to register new enterprise applications.  Once logged in, go into the Azure Active Directory blade and select the Enterprise Applications option.

Register new Enterprise Application

Register new Enterprise Application

Once the new blade opens select the New Application option.

Register new application

Register new application

Choose the Non-gallery application potion since we don’t want to use the AWS app in the Azure Marketplace due to the issues I covered in the first post.

Choose Non-gallery application

Choose Non-gallery application

Name the application whatever you want, I went with AWS SSO to keep it simple.  The registration process will take a minute or two.

Registering application

Registering application

Once the process is complete, you’ll want to open the new application and to go the Single sign-on menu item and select the SAML option.  This is the menu where you will configure the federated trust between your Azure AD tenant and AWS SSO on the Azure  AD end.

SAML Configuration Menu

SAML Configuration Menu

At this point you need to collect the federation metadata containing all the information necessary to register Azure AD with AWS SSO.  To make it easy, Azure AD provides you with a link to directly download the metadata.

Download federation metadata

Download federation metadata

Now that the new application is registered in Azure AD and you’ve gotten a copy of the federation metadata, you need to hop back over to AWS SSO.  Here you’ll need to go to Settings.  In the settings menu you can adjust the identity source, authentication, and provisioning methods for AWS SSO.  By default AWS SSO is set to use its own local directory as an identity source and itself for the other two options.

AWS SSO Settings

AWS SSO Settings

Next up, you select the Change option next to the identity source.  As seen in the screenshot below, AWS SSO can use its own local directory, an instance of Managed AD or BYOAD using the AD Connector, or an external identity provider (the new option).  Selecting the External Identity Provider option opens up the option to configure a SAML trust with AWS SSO.

Like any good authentication expert, you know that you need to configure the federated trust on both the identity provider and service provider.  To do this we need to get the federation metadata from AWS SSO, which AWS has been lovely enough to also provide it to us via a simple download link which you’ll want to use to get a copy of the metadata we’ll later import into Azure AD.

Now you’ll need to upload the federation metadata you downloaded from Azure AD in the Identity provider metadata section.  This establishes the trust in AWS SSO for assertions created from Azure AD.  Click the Next: Review button and complete the process.

AWS SSO Identity Sources

Configure SAML trust

You’ll be asked to confirm changing the identity source.  There a few key points I want to call out in the confirmation page.

  • AWS SSO will preserve your existing users and assignments -> If you have created existing AWS SSO users in the local directory and permission sets to go along with them, they will remain even after you enable it but those users will no longer be able to login.
  • All existing MFA configurations will be deleted when customer switches from AWS SSO to IdP.  MFA policy controls will be managed on IdP -> Yes folks, you’ll now need to handle MFA.  Thankfully you’re using Azure AD so you plenty of options there.
  • All items about provisioning – You have to option to manually provision identities into AWS SSO or use the SCIM endpoint to automatically provision accounts.  I won’t be covering it, but I tested manual provisioning and the single sign-on aspect worked flawless.  Know it’s an option if you opt to use another IdP that isn’t as fully featured as Azure AD.
Confirmation prompt

Confirmation prompt

Because I had to, I popped up the federation metadata to see what AWS requiring in the order of claims in the SAML assertion.  In the screenshot below we see is requesting the single claim of nameid-format:emailaddress.  This value of this claim will be used to map the user to the relevant identity in AWS SSO.

AWS SSO Metadata

Back to the Azure Portal once again where you’ll want to hop back to Single sign-on blade of the application you registered.  Here you’ll click the Upload metadata file button and upload the AWS metadata.

Uploading AWS federation metadata

Uploading AWS federation metadata

After the upload is successful you’ll receive a confirmation screen.  You can simple hit the Save button here and move on.

Confirming SAML

Confirming SAML

At this stage you’ve now registered your Azure AD tenant as an identity provider to AWS SSO.  If you were using a non-Azure AD security token service, you could now manually provision your users AWS SSO, create the necessary groups and permissions sets, and administer away.

I’ll wrap up there and cover the SCIM provisioning in the next post.  To sum it up, in this post we configured AWS SSO in the AWS Organization and established the SAML federated trust between the Azure AD tenant and AWS SSO.

See you next post!

Deep Dive into Azure AD and AWS SSO Integration – Part 2

Deep Dive into Azure AD and AWS SSO Integration – Part 2

Welcome back folks.

Today I’ll be continuing my series on the new integration between Azure AD and AWS SSO.  In my last post I covered the challenges with the prior integration between the two platforms, core AWS concepts needed to understand the new integration, and how the new integration addresses the challenges of the prior integration.

In this post I’m going to give some more context to the challenges covered in the first post and then provide an overview of the what the old and new patterns look like.  This will help clarify the value proposition of the integration for those of you who may still not be convinced.

The two challenges I want to focus on are:

  1. The AWS app was designed to synchronize identity data between AWS and Azure AD for a single AWS account
  2. The SAML trust between Azure AD and an AWS account had to be established separately for each AWS account.

Challenge 1 was unique to the Azure Marketplace AWS app because they were attempting to solve the identity lifecycle management problem.  Your security token service (STS) needs to pass a SAML assertion which includes the AWS IAM roles you are asserting for the user.  Those roles need to be mapped to the user somewhere for your STS to tap into them.  This is a problem you’re going to feel no matter what STS you use, so I give the team that put together the AWS app together credit for trying.

The folks over at AWS came up with an elegant solution requiring some transformation in the claims passed in the SAML token and another solution to store the roles in commonly unused attributes in Active Directory.  However, both solutions suffered the same problem in that you’re forced to workaround that mapping, which becomes considerably difficult as you began to scale to hundreds of AWS accounts.

Challenge 2 plagues all STSs because the SAML trust needs to be created for each and every AWS account.  Again, something that begins to get challenging as you scale.

AWS Past Integration

AWS Past Integration

In the image above, we see an example of how some enterprises addressed these problems.  We see that there is some STS in use acting as an identity provider (idP) (could be Azure AD, Okta, Ping, AD FS, whatever) that has a SAML trust with each AWS account.  The user to AWS IAM role mappings are included in an attribute of the user’s Active Directory user account.  When the user attempts to access AWS, the STS queries Active Directory for the information.  There is a custom process (manual or automated) that queries each AWS account for a list of AWS IAM Roles that are associated with the IdP in the AWS account.  These roles are then populated in the attribute for each relevant user account.  Lastly, CloudFormation is used to push IAM Roles to each AWS account.  This could be pushed through a manual process or a CI/CD pipeline.

Yeah this works, but who wants all that overhead?  Let’s look at the new method.

Azure AD and AWS SSO Integration

Azure AD and AWS SSO Integration

In the new integration where we use Azure AD and AWS SSO together, we now only need to establish a single SAML trust with AWS SSO.  Since AWS SSO is integrated with AWS Organizations it can be used as a centralized identity source for all AWS accounts within the organization.  Additionally, we can now leverage Azure AD to manage the synchronization of identity data (users and groups) from Azure AD to AWS SSO.  We then map our users or groups to permission sets (collections of IAM policies) in AWS SSO which are then provisioned as IAM roles in the relevant AWS accounts.  If we want to add a user to a role in AWS IAM, we can add that user to the relevant group in Azure AD and wait for the synchronization process to occur.  Once it’s complete, that user will have access to that IAM role in the relevant accounts.  A lot less work, right?

Let’s sum up what changes here:

  • We can use existing processes already in place to move users in and out of groups either on-premises in Windows AD (that is syncing to Azure AD with Azure AD Connect) or directly in Azure AD (if we’re not syncing from Windows AD).
  • Group to role mappings are now controlled in AWS SSO
  • Permission sets (or IAM policies for the IAM roles) are now centralized in AWS SSO
  • We no longer have to provision the IAM roles individually into each AWS account, we can centrally control it in AWS SSO

Cool right?

In my few posts I’ll begin walking through the integration an demonstrating some the solution.

Thanks!

Deep Dive into Azure AD and AWS SSO Integration – Part 1

Deep Dive into Azure AD and AWS SSO Integration – Part 1

Hello fellow geeks!

Back in 2017 I did a series of posts on how to integrate Azure AD using the AWS app available in the Azure Marketplace with AWS IAM in order to use Azure AD as an identity provider for an AWS account.  The series has remained quite popular over the past two years, largely because the integration has remained the same without much improvement.  All of this changed last week when AWS released support for integration between Azure AD and AWS SSO.

The past integration between the two platforms functioned, but suffered from three primary challenges:

  1. The AWS app was designed to synchronize identity data between AWS and Azure AD for a single AWS account
  2. The SAML trust between Azure AD and an AWS account had to be established separately for each AWS account.
  3. The application manifest file used by the AWS app to establish a mapping of roles between Azure AD and synchronized AWS IAM roles had a limitation of 1200 which didn’t scale for organizations with a large AWS footprint.

To understand these challenges, I’m going to cover some very basic AWS concepts.

The most basic component an AWS presence is an AWS account.  Like an Azure subscription, it represents a billing relationship, establishes limitations for services, and acts as an authorization boundary.  Where it differs from an Azure subscription is that each AWS account has a separate identity and authentication boundary.

While multiple Azure subscriptions can be associated with a single instance of Azure AD to centralize identity and authentication, the same is not true for AWS.  Each AWS account has its own instance of AWS IAM with its own security principals and no implicit trust with any other account.

Azure Subscription Identity vs AWS Account Identity

Azure Subscription Identity vs AWS Account Identity

Since there is no implicit trust between accounts, that trust needs to be manually established by the customer.  For example, if a customer wants bring their own identities using SAML, they need to establish a SAML trust with each AWS account.

SAML Trusts with each AWS Account

SAML Trusts with each AWS Account

This is nice from a security perspective because you have a very clear security boundary that you can use effectively to manage blast radius.  This is paramount in the cloud from a security standpoint.  In fact, AWS best practice calls for separate accounts to mitigate risks to workloads of different risk profiles.  A common pattern to align with this best practice is demonstrated in the AWS Landing Zone documentation.  If you’re interested in a real life example of what happens when you don’t establish a good radius, I encourage you to read the cautionary tale of Code Spaces.

AWS Landing Zone

AWS Landing Zone

However, it doesn’t come without costs because each AWS IAM instance needs to be managed separately.  Prior to the introduction of AWS SSO (which we’ll cover later), you as the customer would be on the hook for orchestrating the provisioning of security principals (IAM Users, groups, roles, and identity providers) in every account.  Definitely doable, but organizations skilled at identity management are few and far between.

Now that you understand the importance of having multiple AWS accounts and that each AWS account has a separate instance of AWS IAM, we can circle back to the challenges of the past integration.  The AWS App available in the Azure Marketplace has a few significant gaps

The app is designed to simplify the integration with AWS by providing the typical “wizard” type experience Microsoft so loves to provide.  Plug in a few pieces of information and the SAML trust between Azure AD and your AWS account is established on the Azure AD end to support an identity provider initiated SAML flow.  This process is explained in detail in my past blog series.

In addition to easing the SAML integration, it also provides a feature to synchronize AWS IAM roles from an AWS account to the application manifest file used by the AWS app.  The challenges here are two-fold: one is the application manifest file has a relatively small limit of entries; the other is the synchronization process only supports a single AWS account.  These two gaps make it unusable by most enterprises.

Azure AWS Application Sync Process

Azure Marketplace AWS Application Sync Process

Both Microsoft and AWS have put out workarounds to address the gaps.  However, the workarounds require the customer to either develop or run custom code and additional processes and neither addresses the limitation of the application manifest.  This lead to many organizations to stick with their on-premises security token service (AD FS, Ping, etc) or going with another 3rd party IDaaS (Okta, Centrify, etc).  This caused them to miss out on the advanced features of Azure AD, some of which they were more than likely already paying for via the use of Office 365.  These features include adaptive authentication, contextual authorization, and modern multi-factor authentication.

AWS recognized the challenge organizations were having managing AWS accounts at scale and began introducing services to help enterprises manage the ever growing AWS footprint.  The first service was AWS Organizations.  This service allowed enterprises to centralize some management operations, consolidate billing, and group accounts together for billing or security and compliance.  For those of you from the Azure world, the concept is similar to the benefits of using Azure Management Groups and Azure Policy.  This was a great start, but the platform still lacked a native solution for centralized identity management.

AWS Organization

AWS Organization

At the end of 2017, AWS SSO was introduced.  Through integration with AWS Organizations, AWS SSO has the ability to enumerate all of the AWS accounts associated with an Organization and act as a centralized identity, authentication, and authorization plane.

While the product had potential, at the time of its release it only supported scenarios where users and groups were created directly in the AWS SSO directory or were sourced from an AWS Managed AD or customer-managed AD using the LDAP connector.  It lacked support for acting as a SAML service provider to a third-party identity provider.  Since the service lacks the features of most major on-premises security token services and IDaaS providers, many organizations kept to the standard pattern of managing identity across their AWS accounts using their own solutions and processes.

Fast forward to last week and AWS announced two new features for AWS SSO.  The first feature is that it can now act as a SAML service provider to Azure AD (YAY!).  By federating directly with AWS SSO, there is no longer a requirement to federate Azure AD which each individual AWS account.

The second feature got me really excited and that was support for the System for Cross-domain Identity Management (SCIM) specification through the addition of SCIM endpoints.  If you’re unfamiliar SCIM, it addresses a significant gap in IAM in the cloud world, and that is identity management.  If you’ve ever integrated with any type of cloud service, you are more than likely aware of the pains of having to upload CSVs or install custom vendor connectors in order to provision security principals into a cloud identity store.  SCIM seeks to solve that problem by providing a specification for a REST API that allows for management of the lifecycle of security principals.

Support for this feature, along with Azure AD’s longtime support for SCIM, allows Azure AD to handle the identity lifecycle management of the shadow identities in AWS SSO which represent Azure AD Users and Groups.  This is an absolutely awesome feature of Azure AD and I’m thrilled to see that AWS is taking advantage of it.

Well folks, that will close out this entry in the series.  Over the next few posts I’ll walk through what the integration and look behind the curtains a bit with my go to tool Fiddler.

See you next post!


Capturing and Visualizing Office 365 Security Logs – Part 2

Capturing and Visualizing Office 365 Security Logs – Part 2

Hello again my fellow geeks.

Welcome to part two of my series on visualizing Office 365 security logs.  In my last post I walked through the process of getting the sign-in and security logs and provided a link to some Lambda’s I put together to automate pulling them down from Microsoft Graph.  Recall that the Lambda stores the files in raw format (with a small bit of transformation on the time stamps) into Amazon S3 (Simple Storage Service).  For this demonstration I modified the parameters for the Lambda to download the 30 days of the sign-in logs and to store them in an S3 bucket I use for blog demos.

When the logs are pulled from  Microsoft Graph they come down in JSON (JavaScript Object Notation) format.  Love JSON or hate it is the common standard for exchanging information these days.  The schema for the JSON representation of the sign-in logs is fairly complex and very nested because there is a ton of great information in there.  Thankfully Microsoft has done a wonderful job of documenting the schema.  Now that we have the logs and the schema we can start working with the data.

When I first started this effort I had put together a Python function which transformed the files into a CSV using pipe delimiters.  As soon as I finished the function I wondered if there was an alternative way to handle it.  In comes Amazon Athena to the rescue with its Openx-JsonSerDe library.  After reading through a few blogs (great AWS blog here), StackOverflow posts, and the official AWS documentation I was ready to put something together myself.  After some trial and error I put together a working DDL (Data Definition Language) statement for the data structure.  I’ve made the DDLs available on Github.

Once I had the schema defined, I created the table in Athena.  The official AWS documentation does a fine job explaining the few clicks that are provided to create a table, so I won’t re-create that here.  The DDLs I’ve provided you above will make it a quick and painless process for you.

Let’s review what we’ve done so far.  We’ve setup a reoccurring job that is pulling the sign-in and audit logs via the API and is dumping all that juicy data into cheap object storage which we can further enforce lifecycle policies for.  We’ve then defined the schema for the data and have made it available via standard SQL queries.  All without provisioning a server and for pennies on the dollar.  Not to shabby!

At this point you can use your analytics tool of choice whether it be QuickSight, Tableau, PowerBi, or the many other tools that have flooded the market over the past few years.  Since I don’t make any revenue from these blog posts, I like to go the cheap and easy route of using Amazon QuickSight.

After completing the initial setup of QuickSight I was ready to go.  The next step was to create a new data set.  For that I clicked the Manage Data button and selected New Data Set.

Screen Shot 2019-01-31 at 8.57.15 PM.png

On the Create a Data Set screen I selected the Athena option and created a name for the data source.

screenshot2019-01-31at9.01.48pm

From there I selected the database in Athena which for me was named azuread.  The tables within the database are then populated and I chose the tbl_signin_demo which points to the test S3 bucket I mentioned previously.

Screen Shot 2019-01-31 at 9.04.22 PM.png

Due to the complexity of the data structure I opted to use a custom SQL query.  There is no reason why you couldn’t create the table I’m about to create in Athena and then connect to that table instead to make it more consumable for a wider array of users.  It’s really up to you and I honestly don’t know what the appropriate “big data” way of doing it is.  Either way, those of you with real SQL skills may want to look away from this query lest you experience a Raiders of The Lost Ark moment.

indianjones

You were warned.

SELECT records.id, records.createddatetime, records.userprincipalname, records.userDisplayName, records.userid, records.appid, records.appdisplayname, records.ipaddress, records.clientappused, records.mfadetail.authdetail AS mfadetail_authdetail, records.mfadetail.authmethod AS mfadetail_authmethod, records.correlationid, records.conditionalaccessstatus, records.appliedconditionalaccesspolicy.displayname AS cap_displayname, array_join(records.appliedconditionalaccesspolicy.enforcedgrantcontrols,' ') AS cap_enforcedgrantcontrols, array_join(records.appliedconditionalaccesspolicy.enforcedsessioncontrols,' ') AS cap_enforcedsessioncontrols, records.appliedconditionalaccesspolicy.id AS cap_id, records.appliedconditionalaccesspolicy.result AS cap_result, records.originalrequestid, records.isinteractive, records.tokenissuername, records.tokenissuertype, records.devicedetail.browser AS device_browser, records.devicedetail.deviceid AS device_id, records.devicedetail.iscompliant AS device_iscompliant, records.devicedetail.ismanaged AS device_ismanaged, records.devicedetail.operatingsystem AS device_os, records.devicedetail.trusttype AS device_trusttype,records.location.city AS location_city, records.location.countryorregion AS location_countryorregion, records.location.geocoordinates.altitude, records.location.geocoordinates.latitude, records.location.geocoordinates.longitude,records.location.state AS location_state, records.riskdetail, records.risklevelaggregated, records.risklevelduringsignin, records.riskstate, records.riskeventtypes, records.resourcedisplayname, records.resourceid, records.authenticationmethodsused, records.status.additionaldetails, records.status.errorcode, records.status.failurereason  FROM "azuread"."tbl_signin_demo" CROSS JOIN (UNNEST(value) as t(records))

This query will de-nest the data and give you a detailed (possibly extremely large depending on how much data you are storing) parsed table. I was now ready to create some data visualizations.

The first visual I made was a geospatial visual using the location data included in the logs filtered to failed logins. Not surprisingly our friends in China have shown a real interest in my and my wife’s Office 365 accounts.

screenshot2019-01-31at9.26.24pm

Next up I was interested in seeing if there were any patterns in the frequency of the failed logins.  For that I created a simple line chart showing the number of failed logins per user account in my tenant.  Interestingly enough the new year meant back to work for more than just you and me.

screenshot2019-01-31at9.28.45pm

Like I mentioned earlier Microsoft provides a ton of great detail in the sign-in logs.  Beyond just location, they also provide reasons for login failures.  I next created a stacked bar chat to show the different reasons for failed logs by user.  I found the blocked sign-ins by malicious IPs interesting.  It’s nice to know that is being tracked and taken care of.

screenshot2019-01-31at9.31.24pm

Failed logins are great, but the other thing I was interested in is successful logins and user behavior.  For this I created a vertical stacked bar chart that displayed the successful logins by user by device operating system (yet more great data captured in the logs).  You can tell from the bar on the right my wife is a fan of her Mac!

screenshot2019-01-31at9.38.02pm

As I gather more data I plan on creating some more visuals, but this was great to start.  The geo-spatial one is my favorite.  If you have access to a larger data set with a diverse set of users your data should prove fascinating.  Definitely share any graphs or interesting data points you end up putting together if you opt to do some of this analysis yourself.  I’d love some new ideas!

That will wrap up this series.  As you’ve seen the modern tool sets available to you now can do some amazing things for cheap without forcing you to maintain the infrastructure behind it.  Vendors are also doing a wonderful job providing a metric ton of data in their logs.  If you take the initiative to understand the product and the data, you can glean some powerful information that has both security and business value.  Even better, you can create some simple visuals to communicate that data to a wide variety of audiences making it that much more valuable.

Have a great weekend!